Category: Guides

  • Summarize PDF with AI in Minutes (Step-by-Step Guide)

    Summarize PDF with AI in Minutes (Step-by-Step Guide)

    Long PDFs can swallow entire evenings, whether they are research papers, contracts, or 100-page business reports. That time cost drains focus fast.

    When deadlines stack up, reading every line feels almost impossible and very stressful.

    To summarize a long PDF with AI, you upload the file to an AI PDF summarizer, choose how short you want the output, and let the model pull the main points in seconds. With iLovePDFKit you first clean up the file, convert or merge pages, or run OCR on scans, then send that tidy PDF to any AI document summarizer for a fast, reliable overview.

    Keep reading to see this workflow step by step, with zero cost and no account needed.

    Key Takeaways

    These key points turn long PDF reading into a short, repeatable workflow. Scan them before going deeper.

    • AI tools summarize almost any PDF in seconds. You upload a file once and get a clear outline instead of walls of text, saving hours each week for students, office staff, and freelancers.

    • Scanned PDFs behave like photos, not text. Without OCR, AI models see only images and cannot pull sentences or ideas. Running OCR first with iLovePDFKit turns those images into readable text.

    • Free browser tools such as iLovePDFKit need no account or install. You open the site, drop a file, and download the result. That fits shared school computers and locked office laptops.

    • Clear prompts improve summary quality instantly. When you tell the AI which section matters and how short to be, the summary becomes sharper and more useful.

    Table of Contents

    What Does It Mean to Summarize a PDF with AI?

    Professional overwhelmed by stack of long PDF reports

    Summarizing a PDF with AI means using artificial intelligence to pull out core ideas and shorten long documents. The AI reads the full text, finds main arguments, and writes a shorter version in plain language — a process explored in detail in recent work on AI-Powered Document Summarizer Using generative models. You get the gist without reading every paragraph.

    Instead of skimming page after page, an AI PDF summarizer uses natural language processing and large language models, similar to ChatGPT or Microsoft Azure OpenAI Service. The tool looks for headings, topic shifts, keywords, and repeated themes. Then it condenses those parts into a brief overview, bullet list, or executive summary.

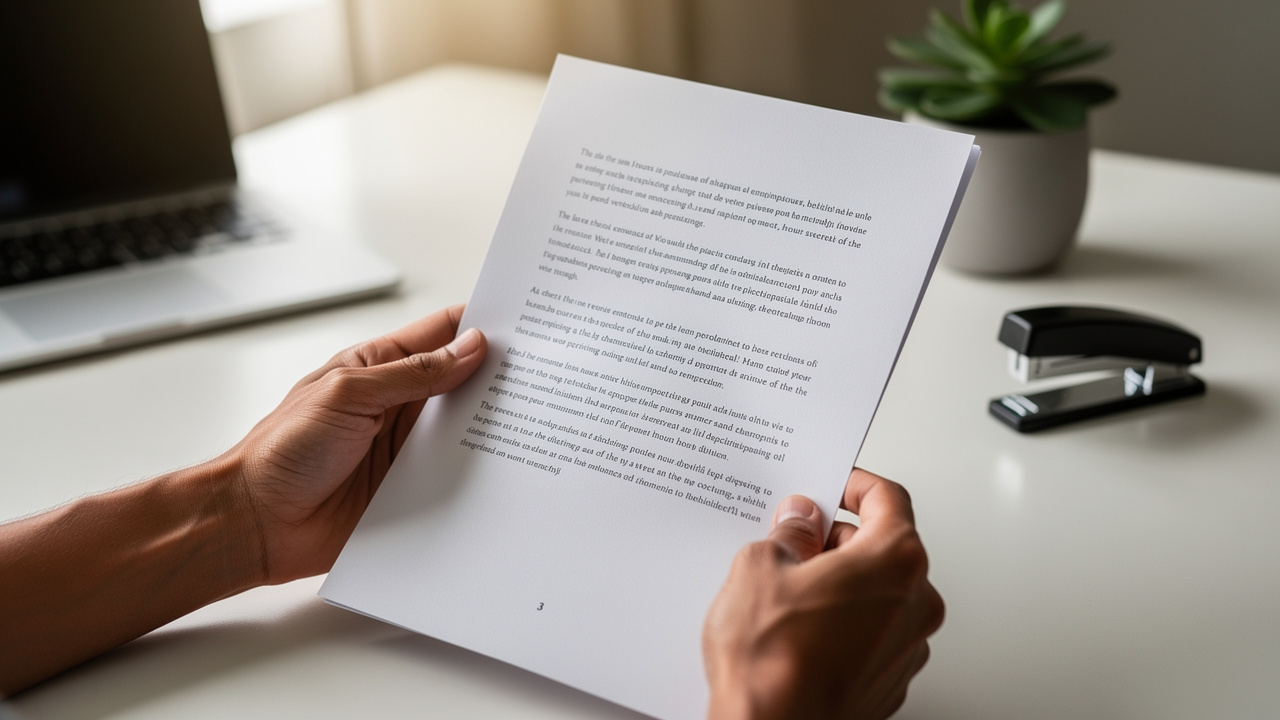
    Manual reading is slow and distraction-prone. According to a 2023 McKinsey survey, employees spend an average of 1.8 hours per day — roughly 9 hours per week — simply searching for and reading work documents, which adds up to more than 20% of a standard working week.

    Nielsen Norman Group estimates that most adults read about 200–250 words per minute, so a 30,000-word report can easily take more than two hours.

    AI can scan those same pages in seconds and present the highlights.

    This matters for students juggling weekly readings, analysts reviewing market reports, and small business owners dealing with contracts. Instead of guessing which sections matter, they can summarize PDFs with AI first, decide what deserves a deeper read, and only then return to the original document for details. Tools such as Adobe Acrobat AI Assistant and NoteGPT show how common this workflow has become.

    How Does AI Summarize a PDF? (The Process Explained)

    AI summarizes a PDF by turning the file into text, understanding the structure, picking key sentences, and writing a shorter version. Each step keeps the main meaning while trimming repeated or minor details, so you can trust the result and spot issues when input files are messy.

    Here is what usually happens behind the scenes:

    1. Text Extraction
      For normal PDFs, the tool reads the text layer directly. For scanned PDFs, it uses OCR to turn each line in the image into characters the model can read. Without that step, a scanned contract looks like one big picture. Research shows that approximately 30% of business documents in circulation are scanned images rather than digital text, making OCR an essential first step for reliable AI summarization.

    2. Structure Analysis
      The AI finds headings, subheadings, paragraphs, lists, and tables. It checks how often terms appear and where they sit in the document, which helps separate background notes from thesis statements, conclusions, or financial results.

    3. Sentence Scoring
      The model scores sentences for importance — a query-driven approach that has been studied extensively, as outlined in recent arxiv research 2508.20559 on real-time text summarization for large-scale documents. Out of thousands of sentences, only a small portion move into the summary.

    4. Rewriting the Summary
      The AI rewrites those key parts into a smooth output, leveraging long-context multimodal understanding as described in the Gemini V1 5 Report.Pdf, which demonstrates how modern large language models process millions of tokens across complex documents. According to Adobe, Adobe Acrobat AI tools have already produced more than 110 million summaries in under two years, which shows how often users rely on this step. Some tools, like Adobe Acrobat AI Assistant or NoteGPT, even add clickable references that jump back to the exact page in the original PDF.

    Why Scanned PDFs Need OCR First

    Flatbed scanner converting printed document to digital text

    Scanned PDFs need OCR before any AI can summarize them because scans are image files, not text. When you scan lecture notes or a signed contract, the result is a picture of a page, even if it looks like text to your eyes.

    OCR software looks at each letter shape and turns it into a real character. After this pass, your PDF has a text layer that AI models can read, search, and summarize. Without OCR, an AI PDF summarizer cannot select sentences or detect headings. Modern OCR engines now achieve accuracy rates above 99% on clean printed text, according to industry benchmarks, meaning that virtually every word in a scanned page is correctly converted before AI processing begins.

    iLovePDFKit includes built-in OCR that handles this step with a few clicks. You upload the scan, pick the language, and download a clean, text-ready PDF that any AI document summarizer can understand. This bridge from paper to AI is essential for schools and offices that still rely on printed forms and marked-up copies.

    How to Summarize a PDF with AI Step-By-Step

    Organized digital workspace for PDF summarization workflow

    Summarizing a PDF with AI follows a repeatable path, from file prep to final summary. This section walks through that path so you can go from a messy document to clean key points in minutes, not hours.

    Start by planning your goal. Decide whether you want a short overview, study notes, or action items for a meeting. That choice will guide the prompt you use later. Then follow these steps with iLovePDFKit and your preferred AI PDF summarizer.

    • Step 1 Prepare Your PDF with iLovePDFKit
      Use iLovePDFKit to convert Word, Excel, or PowerPoint files into stable PDFs while keeping fonts, tables, and layouts intact. If the document is scanned, run OCR so the text becomes searchable. You can also merge several reports or extract only the chapters you care about, so the AI does not waste effort on extra pages.

    • Step 2 Upload the PDF and Set Preferences
      Open your chosen AI PDF summarizer, such as Adobe Acrobat AI Assistant, NoteGPT, or a ChatGPT-style reader that accepts file uploads. Drag and drop the prepared PDF, or pull it straight from Google Drive or Dropbox. Then set options like summary length, language, and whether you want bullet points, an outline, or a single paragraph.

    • Step 3 Write a Clear, Specific Prompt
      Generic prompts bring generic results, so tell the AI exactly what you need — a pattern consistent with how students most commonly interact with AI tools, as documented in How People Are Using ChatGPT across real-world use cases. For example, you might say, “Summarize the methodology and key findings in 5 short bullet points for exam revision,” or “Summarize only the payment and liability clauses for a non lawyer.” These details steer the model toward the right sections. Studies on prompt engineering show that well-structured, role-specific prompts can improve AI output relevance by up to 40% compared to vague one-line instructions.

    Tip: Mention who you are (for example, student, lawyer, manager) and what you need the summary for, so the AI can write at the right level of detail.

    • Step 4 Review, Refine, and Save Your Summary
      Read the summary and compare any important claims with the original pages, especially for legal or medical content. If something feels off or too long, send a follow-up prompt that asks for a shorter version or focuses on a different section. Then copy the text into notes, export it, or share it with teammates. NoteGPT reports more than 80 million users and over 12,000 school and team partners, according to NoteGPT, which shows how common this review loop already is in study and office workflows.

    Why iLovePDFKit Is the Best Free Tool to Prepare PDFs for AI Summarization

    Student using AI tools to summarize PDF study materials

    iLovePDFKit works as the ideal pre-step before any AI PDF summarizer, especially when you handle many files each week. It solves common problems such as paywalls, broken layouts, or risky file storage, yet stays simple enough for non technical users.

    According to PCWorld, users now expect strong PDF tools inside a browser instead of heavy desktop apps. iLovePDFKit matches that expectation with a clean interface that feels simple on school laptops or shared office computers. Here is why it fits so well into an AI summary workflow.

    • Truly Free with No Task Limits
      Many PDF services let you merge or convert only a few files per day before asking for a monthly fee — a frustration that reflects the broader need for accessible AI tools highlighted in the 2025 microsoft ai in Education Report, which calls for reducing cost barriers in AI-assisted workflows. The same report notes that 63% of educators identify high software costs as a primary barrier to adopting AI tools in classrooms. iLovePDFKit keeps its main tools free, so you can convert, compress, or split as many documents as needed. That helps during exam weeks, monthly reporting cycles, or busy client seasons when document counts spike.

    • Zero Sign Up and Fully Browser Based
      Some staff and students cannot install programs or create new accounts on managed devices. iLovePDFKit runs in any modern browser with no login screen and no password. You visit the site, drop files, and download results, which makes quick prep for AI summarization painless even on locked-down hardware.

    • Strict Privacy with No File Storage
      Uploading contracts, invoices, or graded assignments always raises privacy questions. iLovePDFKit processes files over encrypted connections and deletes them from servers as soon as the task finishes, so nothing sits in long-term storage. That policy matters when you later send those same files to AI tools from Adobe or Microsoft.

    • No Watermarks and Pixel-Perfect Output
      Free tools sometimes add logos or break tables, which confuses AI models that rely on clear structure. iLovePDFKit keeps fonts, headings, and table layouts in place, so an AI document summarizer reads the file as the author intended. When inputs look sharp, summaries tend to be clearer and closer to the original meaning.

    You can think of the workflow like this:

    Task TypeUse iLovePDFKit To…Then Use an AI Summarizer To…
    Scanned notesRun OCR and clean up pagesCreate concise study notes
    Long reportMerge sections and fix layoutGenerate an executive-style summary
    Multiple contractsCombine or extract key clausesHighlight payment, risk, and liability sections

    According to McKinsey, knowledge workers may spend more than a quarter of their time searching and reading information. A smooth pipeline from iLovePDFKit into AI summarizers cuts that time by turning messy source files into tidy, easy-to-process PDFs.

    Frequently Asked Questions

    Q1 Can I Summarize a PDF for Free Without Creating an Account?

    Yes. You can summarize a PDF for free without an account by using browser tools. iLovePDFKit lets you convert, merge, or run OCR on files with no login. After that, you can upload the cleaned PDF to a free AI summarizer and get a quick overview. This keeps the whole flow simple and low-friction.

    Q2 What Is the Best AI PDF Summarizer for Students?

    The best AI PDF summarizer for students is one that is free, fast, and easy to open on shared devices. Many students pair tools like Adobe Acrobat AI Assistant or NoteGPT with iLovePDFKit, which prepares chapters, extracts pages, and fixes scans before summarization. That mix turns heavy readings into study notes in a few minutes. A 2024 Educause survey found that 72% of college students reported using AI tools at least once per week to help process assigned readings, underlining just how central fast summarization has become to modern study habits.

    Q3 Can AI Summarize a Scanned PDF?

    AI cannot summarize a scanned PDF until OCR runs on it. A scan is only an image, so the model cannot read text directly. iLovePDFKit converts scans into text-searchable PDFs with built-in OCR, which makes the file ready for any AI document summarizer. After that, summaries work just like with normal digital PDFs.

    Q4 Is It Safe to Upload Confidential Documents to an AI PDF Summarizer?

    Safety depends on the platform policy and how it handles uploads. iLovePDFKit uses secure connections and deletes files once processing finishes, so documents do not stay on servers. When you send those PDFs to tools from Adobe or other vendors, always read their privacy pages and look for clear rules about storage and training use.

    Q5 How Long Does It Take to Summarize a PDF with AI?

    Most AI summarizers complete a standard report in a few seconds, even when it runs to dozens of pages. Longer, image-heavy files can take more time, but smart engines keep that delay short. Many free tools support uploads up to about fifty megabytes, according to Adobe, which covers most class readings and office reports.

    The Smarter Way to Handle PDFs Starts Here

    Clean modern home office optimized for productive PDF workflows

    The smarter way to handle PDFs starts by separating file prep from summarization. iLovePDFKit handles conversion, merging, page extraction, and OCR, then any AI PDF summarizer turns that clean file into quick insights. This split keeps each step simple while saving serious time.

    Think of the workflow as prepare, summarize, then study or act. Students prepare lecture notes and research papers with iLovePDFKit, send them to AI readers like NoteGPT or Adobe Acrobat AI Assistant, and turn the output into flashcards. Office teams fix layout issues or combine attachments before sharing summaries with managers who do not have time for full reports.

    Conclusion

    To summarize a long PDF with AI quickly, you only need a clean file, a clear prompt, and a trustworthy tool chain. iLovePDFKit gives you the free, secure preparation layer that turns messy scans and mixed formats into crisp PDFs. AI summarizers then handle the heavy reading work, compressing dense content into short, action-ready notes. Start with one document and build this simple pattern into your daily study or work routine.

  • How to Convert Excel to PDF (Free Methods)

    How to Convert Excel to PDF (Free Methods)

    Introduction

    Spreadsheets often look perfect on your screen, then fall apart when someone else opens them. Columns slip onto new pages, charts shift position, and formulas are easy to overwrite by accident. That is why so many people search for how to convert Excel to PDF before sending important files.

    Converting to PDF freezes your layout, protects formulas from casual edits, and makes the file easy to open on almost any device. In this guide, you will learn simple ways to convert Excel to PDF for free, including a fast browser method with iLovePDFKit. You will also see how a few quick page setup tweaks keep your exports clean and readable.

    By the end, you will know which method fits your device, your privacy needs, and your deadline.

    Key Takeaways

    This quick snapshot shows what you will get from the rest of the guide.

    • You can convert online with iLovePDFKit. It is free and needs no sign up. Desktop Excel also saves directly as PDF.

    • Smart page setup avoids cut‑offs. Print Area, scaling, and page direction settings keep wide sheets tidy.

    • Online work needs strong privacy. Secure upload, fast deletion, and no accounts help protect your data. Different roles favor different methods.

    How To Convert Excel To PDF Using iLovePDFKit (Free & No Registration)

    Person uploading Excel file in a web browser on laptop

    This section explains how to convert Excel to PDF with iLovePDFKit using a simple online tool. iLovePDFKit runs in any modern browser, so you skip installs, logins, and watermarks.

    To start, open your browser on Windows, macOS, Linux, Chromebook, Android, or iOS. Go to the iLovePDFKit website and look for the clear Excel to PDF tool. You will see a large upload area that accepts drag and drop. You can also click to pick an XLS or XLSX file from your computer, Google Drive, or Dropbox.

    A quick step‑by‑step flow looks like this:

    1. Open your browser and visit the iLovePDFKit Excel to PDF tool.

    2. Drag your Excel file into the upload box, or click to choose it from local storage or the cloud.

    3. Wait a few seconds while the site processes your workbook.

    4. Click Download to save the finished PDF to your device.

    Once you upload the file, iLovePDFKit begins processing it in real time. The converter reads your Microsoft Excel workbook structure, including fonts, merged cells, charts, and images. According to Microsoft, Excel stores modern workbooks in an XML‑based format, which makes this kind of structured reading very reliable. Within a few seconds, the site shows a ready‑to‑download PDF.

    Next, click the download button to save the PDF to your device. There are no watermarks, no locked features, and no credit card walls. The layout you see in Adobe Acrobat Reader, Apple Preview, or your browser’s PDF viewer matches your original sheet, so grades, prices, or report totals stay clear and stable.

    “When you are rushing to send a report, the best tool is the one that lets you finish the job with as few clicks as possible.”
    — Common productivity advice

    iLovePDFKit keeps things free and simple in three key ways:

    • It does not ask for an email address or account, which cuts friction for students sharing assignments or freelancers racing to invoice a client.

    • It avoids tight task or size caps, so you can convert a one‑page grade sheet or a large monthly report.

    • It uses a strict no‑file‑storage approach, deleting both the Excel upload and the final PDF from its servers right after processing, which helps protect your data even when you work on shared Wi‑Fi.

    If you often wonder how to convert Excel to PDF five minutes before a deadline, bookmarking iLovePDFKit can remove a lot of stress.

    How To Convert Excel To PDF Using Built‑In Desktop Methods

    Desktop computer showing Excel workbook ready for PDF export

    This section explains how to convert Excel to PDF using the tools already built into Microsoft Excel on your computer. These methods are ideal when you prefer to keep data offline or must follow strict company rules.

    The first option is the Save As method, which feels very natural. Open your workbook in Excel on Windows or macOS, then go to File and choose Save As. Pick a folder, open the file type list, and select PDF. Before you click Save, you can open Options to choose the active sheet, a page range, or the entire workbook. This is a good fit when you want a quick snapshot of one sheet or a predictable section of a report.

    The second option is the Export method, often used for polished reports. Go to File, then choose Export, then Create PDF/XPS. A new window lets you pick where to save the file and how to optimize it. You can select a smaller file size for email, choose specific pages, or fine‑tune other publish settings. According to Microsoft, these export controls are designed for sharing workbooks beyond Excel, for example on the web or in print.

    The third option is the Print To PDF method, which many office workers use daily. Press Ctrl + P on Windows or Cmd + P on Mac to open the Print screen. In the Printer list, choose Microsoft Print to PDF or another virtual PDF printer, then pick Active Sheet, Entire Workbook, or Selection. If you highlight a small data block before pressing Ctrl + P, the Selection option exports only that range, which is perfect for tight client summaries or status snippets.

    “If a spreadsheet contains sensitive salary data or contracts, keep every step of the process on hardware you trust.”
    — Common IT security guidance

    All three desktop methods keep every step on your own machine, which matters when you handle payroll records or internal budgets. If you already know how to convert Excel to PDF with these tools, adding iLovePDFKit simply gives you a fast backup when you switch devices or do not have Excel installed.

    When To Choose Online vs. Desktop Conversion

    Choosing between iLovePDFKit and desktop Excel depends on your device, your data, and your time.

    • Pick iLovePDFKit when you are on a Chromebook, tablet, or borrowed computer. You just open a browser, upload, and download within seconds. There is no learning curve, no installer, and no account.

    • Stay with desktop Excel when files should never leave secure company hardware. You work offline, follow internal rules, and keep full control over page range and print settings.

    • Many people use both paths during the week. Online tools cover study sessions, travel, or quick client replies. Desktop exports handle locked‑down reports at the office or under strict compliance rules.

    Preparing Your Spreadsheet Before Converting: Page Setup Tips That Actually Matter

    Printed spreadsheet with margin and page setup adjustments

    This section explains how to prepare your worksheet so the PDF looks clean, readable, and professional. Good page setup turns any method of conversion, online or desktop, into a smoother experience.

    Start with the Print Area. In Excel for Microsoft 365 or Excel 2021, select only the cells you want in the final PDF. Go to the Page Layout tab, open the Print Area menu, and choose Set Print Area. Everything outside that box, such as scratch math, hidden helper columns, or draft charts, stays out of the export.

    Next, control how the sheet fits on the page by using Scale To Fit. On the Page Layout tab, look for Width, Height, and Scale. If your table runs just a bit wide, set Width to 1 page and leave Height on Automatic. Excel shrinks the columns just enough so that nothing spills onto a second page. According to Nielsen Norman Group, cramped or broken layouts make PDFs much harder to read, so a small scale change can help readers a lot.

    You also need to match the page direction to your data shape. For many columns, switch Orientation to a horizontal direction so the sheet spreads across the page instead of stacking into too many pages. You can pair this with Narrow margins to reclaim a little extra space at the top, bottom, and sides. Always check Print Preview in Excel or open a quick test PDF in Adobe Acrobat or your browser before sending a final copy.

    “PDF files are great for printing, but they are not good for on‑screen reading and navigation.”
    — Jakob Nielsen, Nielsen Norman Group

    Before converting, a quick checklist can help:

    • Confirm the Print Area includes only what your recipient needs to see.

    • Use Scale To Fit so key columns sit on the same page where possible.

    • Set orientation and margins to match your most important tables and charts.

    These setup steps matter even when you plan to use iLovePDFKit. The online tool respects whatever Print Area, scaling, and page direction you set inside Excel. Once you learn these controls, you set them once, then every export, online or desktop, looks like a polished report rather than a rough dump.

    Is It Safe To Convert Excel Files Online? Security and Privacy Explained

    Steel padlock on laptop keyboard symbolizing online file security

    This section explains how online Excel to PDF tools handle your files and why iLovePDFKit focuses heavily on privacy. For many people, security is the main reason they hesitate to use web converters at first.

    When you upload a spreadsheet to a trusted site, the file travels over an encrypted connection. Services use TLS, the same kind of protection used by online banking, so people on the same Wi‑Fi network cannot read the data in transit. According to Pew Research Center, most American adults now access the internet daily, often on shared or public networks, which makes this type of encryption vital.

    iLovePDFKit adds another key layer, a strict no‑file‑storage policy. Your Excel file is processed in memory on the server, turned into a PDF, then both versions are removed as soon as the conversion finishes and you download the result. There is no long‑term archive, no manual clean up, and no marketing profile built from your documents.

    You also do not create an account to use iLovePDFKit. That means no email address in a database and no password to protect. For many students, freelancers, and office staff, this anonymous flow adds peace of mind on top of fast performance. According to Adobe, PDF remains one of the most common formats for sharing business documents, so having a safe way to create it online is very helpful.

    “Treat every spreadsheet as if it might be forwarded outside your organization.”
    — Common data‑protection advice

    If you handle very sensitive records under strict policy, local desktop exports in Excel may still be the better path. For everything else, especially when you need to convert on a phone or home laptop, iLovePDFKit gives you a secure, clean, and fast way to move from Excel to PDF without adding extra risk.

    Final Thoughts: Pick the Method That Works Best for You

    Person reviewing a converted PDF spreadsheet on a tablet

    You now know two clear paths for turning spreadsheets into stable PDFs. iLovePDFKit gives you fast, free, no‑registration conversion from any modern browser, which is ideal for school work, travel days, or quick client replies.

    Desktop Excel exports help when you must stay offline or control every detail of the output. In both cases, careful Print Area and Scale To Fit settings keep your pages tidy. The next time you wonder how to convert Excel to PDF before a deadline, open iLovePDFKit first and keep desktop methods as a handy backup.

    Frequently Asked Questions

    These common questions cover details that often come up when people start converting spreadsheets to PDF.

    Question 1: Can I Convert Only One Sheet From an Excel Workbook to PDF?

    Yes, you can export a single sheet. In desktop Excel, choose File, then Save As or Print, and pick Active Sheet or a Selection. With iLovePDFKit, set the active sheet in Excel before saving, then upload the file and the tool focuses on that sheet layout. You can also adjust the Print Area if you want to send only part of that sheet.

    Question 2: Will My Excel Charts and Graphs Appear Correctly in the PDF?

    Yes, good converters keep charts and graphs clear. Desktop methods flatten them into high‑quality images. iLovePDFKit reads Excel formatting, colors, and fonts carefully, so your charts, conditional formatting, and images look the same in Adobe Acrobat or any standard PDF viewer. For the best results, check Print Preview to confirm chart sizes before converting.

    Question 3: Is There a File Size Limit When Using Free Online Converters?

    Many free tools cap file size or the number of daily tasks. iLovePDFKit avoids tight limits, so you can convert long reports and multiple sheets in one go. Very large workbooks may take a little longer to process, but they still complete without extra payment. If performance slows, you can remove unused sheets or archive tabs you no longer need.

    Question 4: Can I Convert PDF Back to Excel After Converting?

    Yes, you can move from PDF back to an editable sheet. iLovePDFKit offers a PDF to Excel tool that reconstructs tables into real cells. This helps when someone sends only a PDF copy or when the original workbook gets lost on an old device. You may still want to review the converted sheet for small alignment tweaks before sharing it again.

    Question 5: Do I Need To Create an Account To Use iLovePDFKit?

    No, iLovePDFKit works without any registration. You visit the site, upload your Excel file, convert it, and download the clean PDF. The service deletes files from its servers right after processing, which keeps the whole flow fast, anonymous, and secure. This makes it convenient for one‑off tasks as well as frequent everyday use.

  • How to Convert PDF to JPG Online in 4 Easy Steps

    How to Convert PDF to JPG Online in 4 Easy Steps

    Table of Contents

    Introduction

    iLovePDFKit gives you one of the fastest free ways to convert a PDF to JPG online — directly in your browser, with no software to install. According to Statista, over 2.5 trillion PDF files are opened globally each year, yet countless platforms still refuse PDF uploads and demand image files instead.

    This guide covers the full PDF-to-JPG process in four clear steps, explains how to pick the right image format, and shows how to stay safe while you work. You get a clean, high‑quality image you can use anywhere without installing software.

    Keep reading to see where PDF to JPG conversion helps most, then try the tool yourself in just a few clicks.

    Key Takeaways

    Here is what you will learn before you start converting files.

    • A simple meaning of PDF to JPG conversion and why it matters for sharing, printing, and editing. You will see how a PDF page becomes a flat image that keeps the same look everywhere. This makes it easy to drop into slides, documents, or chats.

    • A four‑step walkthrough using iLovePDFKit that you can follow even on a shared computer at school or work. Each step uses plain language, so you never wonder what to click next. You go from upload to download in seconds without any signup.

    • A quick explanation of the difference between full‑page conversion and image extraction. You will know when to turn whole pages into pictures and when to pull just a chart or photo. This saves you from manual cropping and low‑quality screenshots.

    • Clear guidance on when to choose JPG, PNG, or TIFF as your output format. You will see which type keeps text sharp, which one keeps email attachments light, and which one print shops prefer. This helps you avoid sending the wrong file to a teacher, client, or colleague.

    • A short overview of how iLovePDFKit keeps your documents private and secure while you convert. You will see how encrypted connections and fast deletion protect invoices, contracts, and research papers, so you can use the tool with confidence on personal and work files.

    Why Convert PDF To JPG – And When Does It Matter?

    Person uploading a PDF document on a laptop browser

    Converting a PDF to JPG matters whenever you need a document to behave like a picture that opens instantly everywhere. Images slide smoothly into Microsoft Word, PowerPoint, Google Slides, social feeds, and many email apps, while PDFs often hit limits. So learning to convert PDF to JPG makes daily school and office tasks easier. According to Adobe, people open billions of PDFs every year in Acrobat and Reader, yet many sites still block direct PDF uploads — one survey found that more than 60 percent of web forms accept only image file types.

    Many web forms only accept JPG or PNG for profile photos, receipts, or ID snapshots. Social networks such as Instagram and LinkedIn display image files in the feed but hide PDFs behind extra taps. When your content lives inside a document, quick conversion to an image clears that roadblock.

    “A picture is worth a thousand words.” — Common proverb

    Here are a few everyday situations where converting PDF to image files helps a lot:

    • Students and researchers often need to reuse figures from long PDF articles. Turning one page into a JPG lets you paste a clean chart into Google Docs or Microsoft Word without messing up spacing. You keep the citation visible, and your slide deck looks neat on every projector. Once you know this process, grabbing pages from long readings becomes almost automatic.

    • Office professionals share flyers, schedules, and internal memos through tools like Outlook, Gmail, and Microsoft Teams. Converting those PDFs into JPG images makes them appear right inside the email body or chat window. People can scan the message at a glance without opening a separate viewer. Mastering this conversion means every message can show the flyer right away instead of hiding it in an attachment.

    • Freelancers and small business owners send invoices, mockups, and quick proofs to clients who may only check mail on a phone. A light JPG loads faster than a multi‑page PDF and is easier to preview in apps such as WhatsApp or Slack. That means fewer support messages asking how to open the file.

    How To Convert PDF To JPG Using iLovePDFKit (Step-By-Step)

    Person converting a PDF file on a smartphone

    You can convert PDF to JPG with iLovePDFKit in just four simple steps, all inside your regular web browser. The entire process — from upload to finished image download — typically takes under 30 seconds, even for multi-page documents. Everything happens on iLovePDFKit servers, so even older computers stay fast while the work is done online.

    1. Open the iLovePDFKit PDF to JPG tool. Type the site address into Chrome, Safari, Firefox, or Edge, then pick the PDF to JPG option from the home screen. The page loads cleanly on Windows, macOS, Linux, and Chromebooks. You see a clear upload area in the center.

    2. Upload your PDF from your computer or cloud storage. You can click the button to browse files, or simply drag and drop the document into the box. If your work lives in Google Drive or Dropbox, use the cloud icons and pick the right file there. Large research papers and multi‑page reports usually upload in just a moment on most connections.

    3. Let iLovePDFKit run the conversion for you. As soon as the upload finishes, the PDF to JPG converter engine starts turning each page into a high‑quality image. There is nothing for you to tweak, so beginners feel comfortable right away. Server‑side processing keeps fonts, colors, and layout sharp while finishing the job quickly.

    4. Download your new JPG files to finish. For single‑page documents, you get one ready‑to‑use image that you can drop into Word, PowerPoint, or a learning portal. For longer PDFs, iLovePDFKit groups all the pages into a ZIP file so you save everything with one click. The output comes watermark‑free, so you can share it directly with teachers, clients, or coworkers.

    After you run through these four steps once, the process becomes second nature whenever a site asks for an image. The interface on iLovePDFKit stays the same across devices, so your muscle memory carries over. Many users keep a browser tab pinned with the tool so conversions are always one click away.

    What Happens To Your File After Conversion?

    Laptop with padlock symbolizing secure PDF file conversion

    After conversion, iLovePDFKit keeps your PDFs and JPGs on its servers only for a short, temporary window. Files travel over encrypted HTTPS connections, so outside parties cannot read your content while it moves between your device and the site.

    Once you download your images, automatic cleanup removes both the original document and the converted files from storage after a brief period. Guest users do not need an account and still receive the same protections as registered users. This makes the tool a good choice for pay stubs, invoices, school records, and other private paperwork.

    “Data is a precious thing and will last longer than the systems themselves.” — Tim Berners‑Lee

    Data protection matters because file leaks are expensive. According to IBM, the average global data breach now costs companies more than $4.45 million — a figure that rose 15 percent over three years. Choosing a secure PDF to image converter like iLovePDFKit lowers the chance that sensitive files sit around longer than needed.

    JPG, PNG, Or TIFF – Which Output Format Should You Choose?

    Three image format samples showing JPG PNG and TIFF quality differences

    JPG is the right default for most tasks, PNG is better when you need pixel-perfect sharpness, and TIFF is reserved for professional print work. Each format suits different situations, so choosing well keeps your work easy to share and read. According to W3Techs, JPEG and PNG appear in well over 70 percent of images on websites, which shows how common they are for daily use — while TIFF accounts for fewer than 1 percent of web images due to its large file size.

    Once you understand the PDF-to-image conversion process, you can also explore tools that let you convert PDF to JPG, PNG to compare output quality before committing to a format. Think of JPG as the lean, ready‑to‑send option, PNG as the sharp choice for diagrams, and TIFF as the heavy‑duty format for printing. iLovePDFKit lets you pick the one that matches your task at download time. If you are not sure, start with JPG, then move to PNG or TIFF only when you truly need extra quality.

    FormatBest ForTrade Off
    JPGEmail attachments, online forms, social media posts, class slidesSmall file size, but some detail is compressed and may soften if edited many times
    PNGScreenshots, charts, line art, pages with small text or iconsLarger files than JPG, yet text and edges stay crisp and reuse does not lower quality
    TIFFPrint shop files, archival copies, high‑end photography proofsVery large files that are slow to send, and many web tools and phones will not open them

    For students turning workbook pages into study images or adding pages to Google Slides, JPG almost always makes the most sense. Office staff who share manuals inside SharePoint or Slack also stay safe with JPG because it loads fast for everyone. Academic authors preparing figures for journals, or designers sending posters to a print house, should move up to PNG or TIFF when reviewers demand maximum clarity. If you need to convert PDF pages with tight text and charts, choose PNG instead and keep every pixel.

    Convert PDF To JPG On Any Device – Windows, Mac, And Mobile

    Laptop tablet and smartphone showing same PDF conversion workflow

    Converting PDF to JPG with iLovePDFKit works the same on Windows, Mac, Linux, Chromebooks, iPhones, and Android phones. You only need a modern browser and internet, so even locked office machines and school lab computers can use it without help from IT. According to Pew Research Center, about 85 percent of US adults own a smartphone, which means mobile‑friendly tools are no longer optional. No matter which computer lab or phone you use, the steps for this conversion stay identical across every platform.

    iLovePDFKit runs smoothly in Google Chrome, Microsoft Edge, Mozilla Firefox, and Apple Safari. Because the heavy lifting happens on remote servers in the cloud, your device just handles the upload and download. That keeps laptops cooler and saves battery on phones and tablets.

    Here is how a simple cross‑platform workflow usually looks in practice:

    • On a desktop or laptop computer, you open the site, drag in a PDF from the Downloads folder, and wait a moment while it converts. When the ZIP finishes, you save it and unzip the JPG pages. Those images drop right into Microsoft Word, PowerPoint, Google Docs, or your email program. You can even copy them straight into Microsoft Teams or Slack chats.

    • On a phone or tablet, you visit the same page in Safari or Chrome and tap the upload button. You pick the PDF from the iOS Files app, Google Drive, or your Android file manager. After iLovePDFKit finishes, you save the JPGs directly into your photo gallery. From there, sharing into Messages, WhatsApp, or classroom apps like Canvas is one tap.

    • If you rely on cloud storage, you can stay fully online. Start the conversion on one device using a file from Google Drive or Dropbox, then download the images on another device with the same account. This helps when moving material between a home laptop and a school computer lab. You never need a USB stick or email attachment to bridge the gap.

    Conclusion

    You can start converting PDF to JPG in seconds with iLovePDFKit and skip heavy desktop programs. The tool is completely free, works on every major browser, and delivers watermark-free images — making it one of the most practical options available today. If you ever need to save specific pages as image files, this guide on how to save a PDF as JPEG offers additional methods worth bookmarking. For most homework, office updates, and client previews, pick JPG for easy sharing, then move to PNG for very crisp diagrams or TIFF when a print shop asks for it. Ready to try it now? Just open the free PDF to JPG converter in your browser and turn your next document into a share‑ready image right away.

    Frequently Asked Questions

    These quick answers cover the most common questions about PDF to JPG conversion with iLovePDFKit. Each one stands on its own, so you can scroll straight to whatever matches your problem. Use them as a handy reminder the next time you need to change a PDF into an image fast. If you ever forget the steps, this section gives you a fast refresher.

    Question 1: Can I Convert Only One Specific Page Of A Multi-Page PDF To JPG?

    Yes, every page you upload becomes its own JPG, and you choose what to keep. After conversion, the results screen in iLovePDFKit shows all pages, and you can download only the images you need. That saves storage space and avoids zipping extra files.

    Question 2: Will My PDF’s Formatting And Fonts Look The Same In The JPG?

    Yes, a full‑page conversion works like a screenshot with much higher quality. iLovePDFKit preserves text placement, fonts, colors, and margins exactly as they appear in the original PDF. That means no strange line breaks or missing icons when you share the image.

    Question 3: Is iLovePDFKit Really Free – Are There Hidden Fees Or Watermarks?

    The iLovePDFKit PDF to JPG converter is completely free for students, teachers, freelancers, and small teams. There are no credits, trials, or premium tiers hiding behind the tool. Your images download clean with no watermarks, and you never have to create an account to use the service.

    Question 4: How Do I Convert A PDF To JPG On My iPhone Or Android Phone?

    You convert a PDF to JPG on mobile the same way you do on a computer. Open iLovePDFKit in Safari or Chrome, tap the upload button, and pick your PDF from the Files app or file manager. Then tap convert and save the JPGs into your photo gallery.

    Question 5: What Is The Difference Between Converting A Full PDF Page Vs. Extracting An Image From A PDF?

    Full‑page conversion turns everything on the page into one JPG, which is perfect for sharing a flyer, invoice, or reading page as a picture. Image extraction pulls out only the photos or graphics inside the PDF. For example, a freelancer can grab product photos from a catalog without any surrounding text.

  • Free Online PDF to PowerPoint Converter (No Sign-Up)

    Free Online PDF to PowerPoint Converter (No Sign-Up)

    Introduction

    The clock is ticking before a class presentation or client meeting, and the only version of the content is a PDF. Copying text box by text box into PowerPoint feels endless, and there is no time to rebuild every chart and image from scratch. This is where a free online PDF to PowerPoint converter changes things for the better.

    PDF files are great for sharing, but they freeze the layout. Editing, rearranging, or turning those pages into clean slides becomes hard without the right tool. Manually recreating a deck eats up hours that could go into research, design, or actually preparing what to say.

    iLovePDFKit steps in exactly at this point. It offers a fast, browser-based PDF to PowerPoint converter that works without downloads, sign-ups, or fees. In this guide, you’ll see what a free online converter does, how to convert a PDF to PowerPoint step by step with iLovePDFKit, why the formatting stays pixel perfect, who benefits most, and how the service stays free and secure.

    Key Takeaways

    • iLovePDFKit gives you a free PDF to PowerPoint converter that runs in any modern browser. You can use it on a computer, tablet, or phone. There is no need to install software — just open the page and start.

    • The converter keeps fonts, images, colors, and layout in place. Each page from the PDF turns into a matching slide, so you move straight to editing instead of fixing broken designs. This saves a lot of time.

    • Every file moves through SSL encryption while it uploads and converts. iLovePDFKit removes both the original and converted files right after the process. Your content does not stay on their servers, which keeps sensitive documents safer.

    • The converted file is a standard PPTX presentation that you can edit in Microsoft PowerPoint or any compatible tool. Students, office staff, freelancers, and small business owners all gain a fast way to reuse PDF content for free.

    “The key to great presentations is spending more time on your message than on your tools.” — Garr Reynolds

    A reliable PDF to PPT converter helps you do exactly that.

    What Is a Free Online PDF to PowerPoint Converter — and Why Do You Need One?

    Student using laptop to convert PDF into presentation slides

    A free online PDF to PowerPoint converter is a web tool that turns a static PDF document into a fully editable PPTX file. It runs inside a browser, so there is no program to install and no license to pay for. You visit the page, upload a PDF, wait a few seconds, then download a ready-to-edit PowerPoint deck.

    This type of tool solves a common problem. PDFs are built for viewing and sharing. They lock text, images, and layout into place so that everyone sees the same thing. That is helpful when you want to keep a file consistent, but it creates trouble when you need to reuse the content in a presentation or change numbers, charts, and notes.

    Here are a few everyday situations where an online converter makes a big difference:

    • Students and researchers receive articles, lab reports, and study notes as PDFs but need to present the key ideas in class. With a free converter, those pages become slides that already carry the headings, quotes, and images in the right order. A few edits and design tweaks, and the deck is ready. No late-night copy-and-paste session.

    • Office professionals deal with annual reports, status updates, and client summaries that arrive as PDFs. Instead of rebuilding graphs and tables by hand, they can convert the PDF, clean up a few details, and share a polished slideshow in far less time.

    • Freelancers and small business owners often turn PDF proposals or service overviews into pitch decks. A browser-based converter gives them a quick way to reuse what they already wrote, without extra software costs or setup.

    The old manual method of retyping and rebuilding every slide is slow and full of mistakes. An online converter removes that work. Because it runs in the browser, there are no compatibility issues across Windows, macOS, or mobile devices. PDFs stop being dead ends and start to act as flexible starting points for new, editable presentations.

    How to Convert PDF to PowerPoint Online With iLovePDFKit (Step-by-Step)

    Person uploading a PDF file in a browser converter tool

    iLovePDFKit keeps the conversion process simple, even for someone who rarely edits documents. There is no account to create, no payment screen, and no extra setup. You only need an internet connection and a modern browser such as Chrome, Firefox, Safari, or Edge.

    1. Open the iLovePDFKit PDF to PowerPoint converter page.
      On a desktop, laptop, tablet, or phone, type the iLovePDFKit address into your browser and go to the PDF to PPT tool. The interface is clean and easy to read. You see a clear upload area and a short description of what the converter does.

    2. Upload your PDF from your device.
      Click the upload button or drag the PDF file into the marked area. The tool accepts standard PDF files that come from scans, exported reports, or downloaded articles. You do not need to connect cloud storage or change any settings.

    3. Start the conversion with one click.
      As soon as the upload finishes, iLovePDFKit starts to process the file. Its conversion engine reads each page, finds text blocks, images, and shapes, and then rebuilds them as real PowerPoint objects. Each PDF page becomes one slide, so the order of your content stays the same. Fonts, colors, and alignment stay close to the original layout.

    4. Download your editable PPTX file.
      Within a few seconds for most documents, the tool shows a clear download button. Click it to save the PPTX file back to your device. You can then open it in Microsoft PowerPoint, PowerPoint Online, Google Slides, or any compatible software to start editing, presenting, or sharing.

    Behind these four steps, iLovePDFKit uses SSL encryption from upload to download, so your file moves through a secure connection. Both the original PDF and the new PPTX leave the servers right after the process ends. There are no watermarks, no limits hidden behind a sign-up form, and no learning curve. It works like a true free online PDF to PowerPoint converter that you can rely on when time is short.

    Key Benefits of Using iLovePDFKit’s Free PDF to PPT Converter

    Now that the steps are clear, it helps to see why iLovePDFKit stands out among other web tools. Many converters promise quick results, but they can break layouts, add watermarks, or store files longer than needed — as explored in comparisons of AI PDF to PPT tools that highlight these common shortcomings. iLovePDFKit focuses on two things that matter most for students and professionals: it keeps the formatting accurate and treats security and cost with serious care.

    Format Preservation and Pixel-Perfect Output

    Office professional editing a converted PDF PowerPoint presentation

    The biggest worry with any converter is a messy slide deck full of shifted text and missing images. iLovePDFKit uses an optimized engine that pays close attention to fonts, spacing, and layout. It does not simply take screenshots of pages. Instead, it recreates each element as a native PowerPoint object so that the file looks right and stays editable.

    “Design is not just what it looks like and feels like. Design is how it works.” — Steve Jobs

    Good PDF to PPT conversion follows the same idea: the slides should both look correct and work as real slides you can edit.

    Every PDF page turns into a matching slide. Headings remain in the same place, images sit where they should, and charts keep their relative positions. Fonts and colors stay close to the source, which keeps the overall design consistent. This matters a lot if the original PDF follows a brand guide or academic style rules.

    Because the output stays clean, there is little or no need to spend time fixing broken lines, moving images around, or rebuilding entire sections. Students can focus on polishing their story instead of wrestling with layouts. Office staff can move straight to updating numbers or adding speaker notes. A free online PDF to PowerPoint converter that produces this level of detail can save hours with every project.

    To put this in context, here is how iLovePDFKit compares with many basic web converters:

    FeatureiLovePDFKit PDF to PPTMany Basic Converters
    Layout and font accuracyKeeps layout very close to the original PDFText and images often shift or overlap
    Editable objects in PowerPointText boxes, images, and shapes remain editableContent may be flattened as images
    WatermarksNo watermarks on converted slidesWatermarks sometimes added to each slide
    Ease of useClear steps, runs in any modern browserInterfaces can be cluttered or confusing

    Security, Privacy, and Zero Cost

    Padlock and shield symbolizing secure document encryption privacy

    Uploading important files to a website can feel risky, especially for contracts, grades, or client data. iLovePDFKit treats this concern as a core part of its design. All uploads use SSL-encrypted connections from the browser to the server. That stops outsiders from reading the files as they move across the internet.

    Just as important, iLovePDFKit does not keep files longer than it must. Once the PDF changes to PPTX and the download finishes, both versions leave the servers. No staff member opens user documents, so private information inside reports, agreements, or medical papers stays private. The safest data is the data that leaves no trace.

    On top of that, the service stays one hundred percent free. There is no email wall, trial period, watermark, or paid upgrade needed for basic conversions. You visit the site, use the tool, and leave with a clean presentation.

    For a quick recap, think about security and cost in three points:

    • Secure transfer: Every upload and download uses SSL encryption.

    • Short-lived storage: Files are removed from the servers soon after conversion finishes.

    • No usage fees: The core PDF to PPT tool is free, with no subscription required.

    For students on tight budgets, small businesses that watch every expense, and freelancers who handle many clients, that model makes a real difference.

    Who Benefits Most From a Free Online PDF to PPT Converter?

    Students professionals and freelancers using PDF to PowerPoint converter

    Anyone who works with documents can gain value from a free online PDF to PowerPoint converter, but some groups see extra benefits. Their daily tasks often involve turning written content into slides, usually under time pressure. iLovePDFKit fits right into those workflows.

    • Students and academics often receive lecture notes, research papers, and study guides as PDF files. When a professor assigns a presentation, those same files have to turn into slides fast. With iLovePDFKit, a student can convert the PDF, keep the original headings and citations in place, and then add comments or diagrams on top. That cuts prep time and helps keep focus on understanding the subject instead of fighting with formatting.

    • Office professionals and administrative staff handle reports, meeting packets, and client updates every week. These often arrive as PDFs that need to become boardroom or Zoom presentations. iLovePDFKit helps them turn those static pages into decks in seconds. The layout stays close to the original file, so they only need to adjust small pieces. This speeds up work for team briefings, sales meetings, and training sessions across the company.

    • Freelancers and small business owners depend on clear, fast communication with clients. Proposals, pricing sheets, and contracts often go out as PDFs but need to come back as slide decks for pitch meetings. A free web converter means they can change any PDF into a branded presentation whenever needed, without new software or monthly fees. That keeps the focus on closing deals and serving clients, not on tools.

    Across these groups, iLovePDFKit supports more than just PDF to PowerPoint. The same platform can change PDFs into Word or Excel, and it can turn Office files or images into PDFs as well. That makes it a practical home base for everyday document work, all inside the browser.

    Conclusion

    Turning a PDF into a polished PowerPoint no longer has to feel like a late-night chore. With iLovePDFKit, the process takes just a few clicks. The converter runs online, stays free, and keeps the look of the original file so that the slides are ready for edits and presentation in minutes.

    You do not need to install software, create an account, or worry about watermarks or hidden limits. Files move through SSL encryption and leave the servers right after conversion, which keeps sensitive data safer. The result is an editable PPTX file that matches the original PDF layout as closely as possible.

    Whether the task is a school project, a client pitch, or a weekly status report, a free online PDF to PowerPoint converter like iLovePDFKit removes friction from the process. Visit iLovePDFKit, open the PDF to PPT tool, upload a file, and see how fast it turns into a clean slide deck. From there, the rest of the presentation is up to you.

    FAQs

    Is iLovePDFKit’s PDF to PowerPoint converter really free?
    Yes, the converter is completely free to use. There are no hidden fees, watermarks, or subscription requirements. You do not need to create an account or share an email address. Just upload your PDF, convert it, and download the PPTX file at no cost.

    Will my PDF’s formatting be preserved after conversion?
    iLovePDFKit aims for pixel-perfect output, so fonts, images, colors, and layout stay very close to the original file. Each PDF page becomes one matching slide with elements in the same positions. In most cases, you can use the deck right away without extra formatting work.

    Is it safe to upload my PDF files to iLovePDFKit?
    Yes, the service uses SSL-encrypted connections for every upload and download. Both the original PDF and the converted PPTX leave the servers soon after the process ends. No team member reads or opens user files. This design keeps confidential information inside your documents private.

    Can I use iLovePDFKit on my phone or tablet?
    You can use the converter on any modern device with a browser. It works on desktops, laptops, tablets, and smartphones through Chrome, Firefox, Safari, or Edge. There is no app to install, so you simply open the site on your device and convert PDFs to PowerPoint in a few seconds.

  • How to Convert Word to PDF Quickly and Safely

    How to Convert Word to PDF Quickly and Safely

    Introduction

    The same file can look perfect on one screen and messy on another. Margins shift, fonts change, and a neat table suddenly breaks across pages. Many people learn the hard way that a shared Word file does not always stay the way they designed it.

    That is where knowing how to convert Word to PDF makes life easier. A PDF freezes the layout, fonts, images, and spacing so the document looks the same on any computer or phone. Teachers, clients, and teammates can open it in a browser without installing Word, and it feels more like a finished document than a draft.

    This guide walks through several simple ways to handle how to convert Word to PDF in seconds. It covers iLovePDFKit for fast, free, browser-based conversion, plus the built-in tools in Microsoft Word on Windows and Mac. By the end, anyone can turn a Word file into a clean, shareable PDF without tech stress or extra software.

    Key Takeaways

    Person viewing converted PDF document on smartphone screen
    • Converting Word to PDF preserves layout. Fonts, images, and spacing stay locked in place, so there are no surprise line breaks when someone opens the file on another device. The document looks like a snapshot of the original.

    • iLovePDFKit shows how to convert Word to PDF online for free. It runs in any modern browser without downloads or signups. Files convert in seconds with no watermarks.

    • Microsoft Word can also convert Word to PDF on its own. Save As, Export, and Print to PDF all create clean PDFs offline. These options help when working with sensitive files.

    • Good tools protect both quality and privacy. Look for HTTPS in the address bar and a clear no-file-storage policy. With the right method, the whole process usually takes under half a minute.

    Why Convert Word To PDF?

    Before focusing on how to convert Word to PDF, it helps to know why it matters. A Word document is great while writing and editing, but it is not always stable when shared. Different versions of Word, missing fonts, or changes in page size can shift everything.

    A PDF acts more like a printed page on a screen. It keeps margins, headings, lists, and images exactly where they belong. This matters a lot for resumes, academic papers, invoices, and contracts, where small changes can cause confusion or look unprofessional.

    As many office trainers like to say, “If the layout matters, send a PDF, not a Word file.”

    PDFs also open almost anywhere. Modern browsers and phones can display a PDF with a simple tap. The person on the other end does not need Microsoft Office, which removes one more small hassle during busy days.

    Here are five quick reasons many people choose PDF over Word when sharing a final file:

    • Formatting stays frozen. A PDF works like a visual snapshot of the document. Everyone sees the same layout from first page to last page.

    • PDFs feel more professional. Sending a PDF tells people the file is ready to read, not a rough draft. That can make a better impression on teachers, managers, or clients.

    • Accidental edits are less likely. Most people read PDFs rather than edit them. That protects prices, grades, dates, and signatures from being changed by mistake.

    • Security options are stronger. PDFs can use passwords and limit printing or copying. These controls help when sharing contracts, exam papers, or private reports.

    • Compatibility problems almost disappear. A PDF does not care which font pack or operating system the reader has. If they can open a browser, they can open the file.

    How To Convert Word To PDF Using iLovePDFKit

    Person uploading Word document in browser on laptop

    When someone just wants a fast way to handle how to convert Word to PDF, iLovePDFKit is often the easiest choice. There is nothing to install, nothing to register, and no trial that ends later. Open the site in any modern browser on a laptop, tablet, or phone and start right away.

    The interface keeps things simple. A clear upload area sits in the middle of the screen, with support for drag and drop or manual file selection — similar to other popular DOCX to PDF–Convert Word tools available online today. The Word to PDF converter accepts DOC and DOCX files, along with other common formats, and turns them into clean PDFs without extra steps.

    Here is the basic process from start to finish:

    1. Open iLovePDFKit in a browser. Go to iLovePDFKit and choose the Word to PDF tool. The page loads in a few seconds. This works in Chrome, Edge, Firefox, Safari, and other modern browsers on both desktop and mobile.

    2. Add the Word file. Click the upload button and pick the document from the device, or drag the file from a folder into the upload area. This works on Windows PCs, Macs, tablets, and phones.

    3. Let the automatic conversion run. As soon as the file finishes uploading, the engine starts to convert it to PDF. There is no need to change settings first, which saves time for people who only want a standard PDF.

    4. Download the finished PDF. When the process ends, a download button appears. One click saves the new PDF to the device, ready to email, upload, or print.

    A few things make iLovePDFKit stand out for people who care about speed and accuracy:

    • The service focuses on pixel-perfect output, which means fonts, tables, images, and page breaks match the original Word file.

    • Longer reports or image-heavy documents keep their layout, so there is no need to fix anything later.

    • Conversion is fast even with larger files because the engine is tuned for quick processing.

    • Every feature needed to learn how to convert Word to PDF is free to use, and the site does not add watermarks or ask for payment after a few files.

    • There is no account step, which means no extra passwords to remember.

    Security is a core part of the design. All uploads use HTTPS, the same type of encrypted connection that banks use for their sites. Files are processed in real time and removed from the server right after conversion, so documents do not sit in storage.

    iLovePDFKit also helps beyond Word to PDF. It can convert PDFs back to Word, Excel, PowerPoint, or image formats, and turn many file types into PDFs. That makes it handy for anyone who often switches between document types.

    Here are a few quick examples of how different people use it:

    User TypeTypical FileHow iLovePDFKit Helps
    Student or academicEssays, lab reports, thesesTurns drafts into stable PDFs for online submission without layout changes
    Freelancer or small business ownerInvoices, quotes, brochuresCreates polished PDFs that look good for clients and stay consistent with branding
    Office professionalContracts, meeting reports, manualsConverts working files to shareable PDFs in seconds before mailing or archiving

    Anyone who prefers to work offline can still do that. The next section shows how to convert Word to PDF inside Microsoft Word itself, with no web browser at all.

    How To Convert Word To PDF Directly In Microsoft Word

    Microsoft Word file menu open showing Save As option

    Some people feel more comfortable keeping files on their own computer. If Word is already installed, there is no need to visit a site to figure out how to convert Word to PDF — though resources like 4 Ways to Convert a Word document to PDF outline the full range of available approaches for those who want to compare options. The program includes several built-in options that create a PDF in just a few clicks.

    Method 1: Save As

    This is the most common method for many users. Open the document in Word, then click the File tab and choose Save As. Pick the folder, open the file type menu, and choose PDF. Give the file a name and click the button to save. Word creates a PDF copy while leaving the original Word file unchanged.

    Method 2: Export

    Newer versions of Word include a clear Export choice in the menu. With the document open, click File, then pick Export, and select the option to create a PDF or XPS file. A window appears with PDF already chosen as the file type. Select the folder, change the file name if needed, and click the publish button. This method is helpful when someone wants to treat the PDF as the final published version.

    Method 3: Print To PDF On Windows

    Windows includes a virtual printer named Microsoft Print to PDF. To use it, open the Word document and click File, then Print. In the printer list, choose Microsoft Print to PDF. Adjust options such as page range or orientation if needed, then click the print button. Instead of sending paper to a real printer, Windows asks where to save the PDF file. This method also works from other apps that support printing.

    Method 4: Save As PDF On Mac

    Mac users have a similar system feature. Open the Word file on a Mac, click File, then Print, or press Command plus P. In the print window, look for the PDF menu at the bottom and choose Save as PDF. Type a file name, pick a folder, and, if desired, fill in the title and author fields. Mac users can even set a password at this stage. After clicking save, macOS creates a PDF that looks just like the print preview.

    For best results, switch Word to Print Layout view and scan through each page before using any of these methods. That small check helps catch odd page breaks or images that sit in the wrong place.

    How To Ensure Quality And Security During Conversion

    Laptop with secure document conversion and padlock on desk

    Good tools make it simple to handle how to convert Word to PDF, but people still care about two things — and using a Free Online Document Converter that clearly communicates its quality and privacy standards goes a long way toward addressing both concerns. They want the PDF to look perfect, and they want their files to stay safe. A few quick habits and the right tools cover both points.

    For quality, start by checking the document in Print Layout view in Word. This view shows pages the way a PDF will show them. To keep the final file clean:

    • Fix any text that spills over onto a new line.

    • Move images that sit in strange spots.

    • Use clear, readable fonts and make sure they are installed properly on the system.

    If the document uses rare or custom fonts, consider embedding them before conversion. In Word on Windows, this setting sits in the Save options menu. Embedded fonts travel with the file, which helps match the PDF to the original. Also, give images enough resolution so they do not look blurry when printed or zoomed in. A clean Word file leads to a clean PDF.

    For security, online tools should respect privacy. iLovePDFKit uses HTTPS for all traffic and removes files right after conversion, so documents do not stay on the server.

    A common guideline in IT security is, “The safest data is the data you do not keep longer than you need.”

    That idea fits document conversion perfectly. For very sensitive contracts or reports, using the offline methods inside Word can add extra peace of mind.

    Here is a simple checklist for anyone who wants to use an online converter with confidence:

    • Check for HTTPS. The address bar shows a small lock next to the web address. That lock means the site uses HTTPS, which protects files and data during upload and download. Never send private documents through a site that does not show this lock.

    • Look for automatic file deletion. Good services state that documents are removed automatically once the process finishes. This habit reduces the chance of someone reaching old uploads later.

    • Prefer tools that work without an account. A tool that works without creating a login collects less personal data. That makes the whole process lighter and safer for quick one-time tasks.

    • Read the privacy policy. The privacy policy should be easy to find and read. Clear language about data handling shows that the service takes user trust seriously. If the policy is missing or confusing, it is better to use a different method.

    Conclusion

    Learning how to convert Word to PDF does not need to be complicated. There are simple online methods and built-in tools that cover almost every situation, from last-minute homework to formal contracts.

    iLovePDFKit offers one of the fastest ways to handle this task. It runs in the browser, costs nothing, uses strong encryption, and removes files right after conversion. The output matches the original document with pixel-perfect accuracy and no watermark.

    For people who like to stay offline, Microsoft Word on Windows and Mac can also create PDFs in just a few clicks. Whether someone prefers iLovePDFKit or Word itself, the key idea is the same: a clean PDF is only seconds away, and it makes sharing documents smoother for everyone. Try iLovePDFKit on the next Word file and see how easy a polished PDF can be.

    FAQs

    Is It Free To Convert Word To PDF Online With iLovePDFKit?

    Yes, iLovePDFKit is completely free for Word to PDF conversion. There are no hidden fees or trial periods to worry about. The tool does not add watermarks to the output files. Anyone can open the site, upload a file, and download the PDF right away.

    Will My Formatting Be Preserved When I Convert Word To PDF?

    With a high quality converter such as iLovePDFKit, formatting stays extremely close to the original file. Fonts, images, tables, and page breaks all carry over to the PDF. Problems mainly appear when the Word file uses very low resolution images or rare fonts that are not embedded.

    Is It Safe To Upload My Documents To An Online Converter?

    Uploading to iLovePDFKit is designed to be safe for everyday use. The site uses HTTPS, which keeps data encrypted between the browser and the server. Files are processed as soon as they arrive, then removed from the server. It is still a good habit to check any tool you use for a clear privacy policy.

    Can I Convert Word To PDF On My Phone?

    Yes, the same steps work on a phone or tablet. Open a mobile browser, visit iLovePDFKit, and pick the Word to PDF tool. Upload the document from the device or cloud storage, then download the finished PDF. There is no need to install a separate app.

  • How to Protect PDF With Password in Under a Minute

    How to Protect PDF With Password in Under a Minute

    Introduction

    A file leaves the outbox, and then the thought hits: that contract, grade report, or client invoice might be wide open to anyone who gets the link or email forward. Many people only think about security after a document has already traveled farther than expected. Learning how to protect PDF with password turns that nervous moment into a quick, repeatable step.

    When a PDF has password protection, the content does not just hide behind a popup. The file goes through encryption, so no app can read the text or images without the correct key. With the right settings, only people who know the password can open the file or change anything inside it.

    The good news is that learning how to password-protect a PDF does not require technical skills or paid software. This guide walks through why protection matters, the two different PDF passwords, and a clear, step-by-step process. Everything uses iLovePDFKit, a free, browser-based tool that needs no account, no download, and secures files with AES-256 encryption. By the end, anyone can protect invoices, research papers, contracts, and more in under a minute.

    Key Takeaways

    • There are two main PDF password types. One controls who can open the file, while the other controls what people can do after they open it. Knowing the difference helps match protection to each document.

    • A trusted online tool such as iLovePDFKit protects files with AES-256 encryption inside the browser. No software install or signup gets in the way, and files stay on the server only for a short time during processing.

    • Strong passwords matter as much as strong encryption. Aim for at least 12–16 characters, mix character types, and store each password in a secure password manager so that access stays safe but never lost.

    Why You Should Password-Protect Your PDF Files

    Person securing PDF documents on a laptop at a desk

    PDFs often carry the information people care about most. Common examples include:

    • Tax returns and pay stubs

    • Client proposals and signed agreements

    • Student transcripts and grade reports

    • Medical notes and insurance documents

    These files move through email chains, shared folders, and chat links, often without a second thought about who might see them next.

    Every extra hop creates a chance for the wrong person to gain access. A forwarded email, a mistyped address, or a shared laptop can put private data in front of someone who should never see it. Public Wi‑Fi and shared office computers add more risk, because files may stay in download folders or browser history.

    When someone learns how to protect PDF with password and uses that step every time a document carries sensitive data, they add a strong barrier. Even if the file lands in the wrong inbox, the content stays locked until the viewer types the correct password. This keeps personal, client, or student information from turning into a screenshot or printout in the wrong hands.

    Password protection also shows care and professionalism. Freelancers and small business owners who send secure PDFs signal respect for client privacy and match expectations under data rules such as GDPR or HIPAA. Encryption adds another layer, because it scrambles the data inside the file, not just the file name.

    “The safest data never leaves the device, but the next best choice is data that is encrypted and password-protected.”
    — Common security training advice

    Understanding The Two Types Of PDF Passwords

    Two padlocks representing the two types of PDF passwords

    Before deciding how to protect PDF with password, it helps to know that there are two different password roles inside the PDF format. One controls access to the file itself, and the other limits what people can do after they open it. Keeping both in mind makes it easier to choose the right setup for each document.

    Here is a simple overview:

    Password TypeAlso CalledWhat It ControlsTypical Use Case
    Document Open PasswordUser PasswordWho can open the filePay stubs, grade reports, confidential briefs
    Permissions PasswordOwner PasswordWhat people can do inside the fileContracts, templates, read-only reports

    A Document Open Password works like the lock on a front door. No content shows at all until someone enters the correct password. This fits any case where the main goal is privacy, such as personal records or internal reports. It is an all-or-nothing gate: people who know the password can open the file; people who do not see only a prompt.

    A Permissions Password controls actions rather than access. With this type, people may open the file, but they might not print, copy text, or edit pages without the owner password. This helps when a contract, template, or policy needs wide viewing but should not be changed or copied.

    You can also combine both password types. For example, a client might need a Document Open Password to read a report and then face extra limits from a Permissions Password that blocks printing or copying. For most daily needs such as invoices, research papers, and standard business PDFs, a simple Document Open Password is enough.

    How To Protect A PDF With A Password Using iLovePDFKit

    User uploading a PDF file to an online password protection tool

    Once the basics are clear, the next step is the actual process. Many people search for how to protect PDF with password and expect a long setup, but with iLovePDFKit the whole task takes just a few clicks inside any modern browser.

    iLovePDFKit focuses on speed and privacy. The service is free to use, does not ask for signup, and runs directly in the browser. Files travel through SSL connections, and the tool applies AES-256 encryption to protect the content. Documents stay on the server only for the short time needed for processing, then auto-delete.

    Follow these steps to protect your first file:

    1. Open the iLovePDFKit password protection page.
      Start a browser tab and visit the iLovePDFKit PDF password protection page. The tool loads right away, with no account wall or trial form.

    2. Upload the PDF.
      Add the PDF that needs protection. Use the button to select a file from your device, or drag and drop the PDF into the upload area. If the file is in Google Drive or Dropbox, choose the cloud option and select it there.

    3. Create a password.
      Type the password that will guard the file. The field accepts any mix of letters, numbers, and symbols. A small strength meter appears and gives feedback on how hard the password is to guess.

    4. Confirm the password.
      Enter the same password in the second field. This step reduces the risk of a typo that could lock out the owner and anyone else who should open the document.

    5. Start protection.
      Click the button that starts protection of the PDF. iLovePDFKit encrypts the file with AES-256 and ties the password to the encrypted content so that only people who know it can read the data inside.

    6. Download the protected PDF.
      When processing finishes, download the new protected PDF to your device or back into your preferred cloud folder. The file name usually stays the same, so it helps to add a short note such as “_secured” when saving.

    iLovePDFKit does not store your password and deletes files right after processing finishes, so sensitive contracts, reports, and records stay under the owner’s control.

    When protection is no longer needed, iLovePDFKit also offers a PDF password removal tool. It requires the current password, because the service does not break or guess encryption. This fits cases where an owner wants to share a public version of a file that was private in the past.

    “Security is a process, not a product.” — Bruce Schneier
    Using a simple, repeatable process like this for every sensitive PDF is one of the easiest ways to keep data safer.

    Best Practices For Creating A Strong PDF Password

    Typing a strong password with a green strength indicator on screen

    Strong encryption only helps when the password itself is hard to guess. A simple code such as “1234” or “password” makes any guide on how to protect PDF with password much less effective, because automated tools can guess those in seconds.

    Use this short checklist to build better passwords for protected PDFs:

    • Length matters more than most people think. Aim for at least 12–16 characters so that guessing tools need far more attempts to hit the right combination.

    • Character mix adds another layer of difficulty. Combine uppercase and lowercase letters with numbers and symbols, so that the pattern does not follow common words on a keyboard.

    • Personal details often appear in social feeds or public records. Avoid first names, birthdays, pet names, street names, or simple swaps such as adding a number at the end of a familiar word.

    • Common words and simple sequences belong on a block list. Examples include “document”, “secure”, “qwerty”, “abc123”, and similar strings that attackers test early in any guessing attempt.

    • Passphrases can be easier to recall and much harder to guess. A line such as “Blue!Mango-Cloud9Desk” mixes several words with symbols and numbers, which gives both length and variety.

    • Password reuse turns one weak point into many. Give each protected PDF its own password, or at least avoid using the same phrase that guards email, banking, or cloud accounts.

    Tools such as iLovePDFKit show a live strength indicator while the password is typed. Aim for the strongest rating before clicking the protect button. If a Document Open Password is lost, the encrypted content stays locked, so store these passwords in a trusted password manager instead of on sticky notes or plain text files.

    Conclusion

    Putting a lock on a PDF is no longer a task just for IT teams. With a clear sense of the two password types and a simple browser tool, anyone can learn how to protect PDF with password in minutes. That small habit keeps grade reports, invoices, contracts, and research papers from drifting into the wrong inbox or download folder.

    Choosing the right mix of Document Open and Permissions passwords gives control over both access and actions. Pair that with a hard-to-guess passphrase and strong encryption, and even a shared link carries far less risk.

    iLovePDFKit brings this level of protection to any device with a modern browser. The service stays free, skips account creation, uses AES-256 plus SSL, and removes files right after each task. Head to iLovePDFKit’s PDF password protection page and secure the next important document before sending it, a process that often takes less than a minute from upload to download.

    FAQs

    Can I Password-Protect A PDF For Free?

    Yes. You can password-protect a PDF for free without installing software. iLovePDFKit offers an online tool that shows exactly how to protect PDF with password directly in the browser. The service uses AES-256 encryption with secure SSL connections and removes files right after processing finishes.

    What Happens If I Forget My PDF Password?

    If the Document Open Password is forgotten or typed incorrectly, the file stays locked and the content does not appear. iLovePDFKit does not store passwords and does not bypass encryption, which keeps private data safe. The best habit is to store every PDF password in a trusted password manager from the moment it is created.

    Is It Safe To Upload Sensitive Documents To An Online PDF Tool?

    With a trusted service such as iLovePDFKit, uploads and downloads move through SSL connections that protect data during transfer. Files go through real-time processing on secure servers and then auto-delete right after the task finishes, so nothing stays stored. For highly sensitive records, avoid unknown tools that do not clearly explain how they handle files.

    Can I Remove A Password From A PDF I Own?

    Yes, as long as the current password is known. iLovePDFKit has a PDF password removal feature that takes the original protected file plus its correct password and then saves a new copy without that lock. The tool does not guess or break unknown passwords, which keeps protection strong for files that stay private.

  • How to Add Page Numbers to PDF in Minutes

    How to Add Page Numbers to PDF in Minutes

    Introduction

    A thesis is due at midnight. The PDF looks perfect—until someone asks for page numbers. The clock is ticking, the file already lives as a PDF, and the search for how to add page numbers to PDF starts right away. That moment is stressful for students, office staff, and freelancers alike.

    Page numbers do more than count pages. They help readers jump to the right section, support clear citations in research, and make long reports feel organized instead of messy. Many people think they must buy expensive software or learn a complicated editor just to add a simple number at the bottom of each page. Installing heavy programs on a shared computer or work laptop can also be a problem.

    The good news is that none of that is needed. Browser tools now make it simple to learn how to add page numbers to PDF in just a few clicks. iLovePDFKit is one of those tools, built to be free, fast, secure, and ready without registration. By the end of this guide, you will know exactly how to add page numbers to a PDF online in seconds, customize how they look, use batch processing, and keep your files safe the whole time.

    Key Takeaways

    • No Extra Software Needed: Adding page numbers no longer requires paid desktop software or a long setup. With iLovePDFKit, you can learn how to add page numbers to pdf online in just a few quick steps. Everything happens in your browser, so you can work from almost any device.

    • Flexible Formatting: iLovePDFKit gives you control over how your numbers appear on the page. You choose the position, style, and page range so your file matches academic rules, office templates, or client guidelines. The same simple tool also works for handling several PDFs in a single batch.

    • Privacy And Security Built In: Files sent through iLovePDFKit are protected during upload and download with SSL encryption. The service removes your documents from its servers soon after processing and never asks you to create an account, which helps keep both your data and your privacy under control.

    Why Adding Page Numbers to a PDF Matters

    Student working on PDF document late at night

    A PDF with no page numbers looks fine at first glance, yet it quickly becomes hard to use once it grows past a few pages. Numbered pages show that a document is planned, checked, and ready for serious use, which matters for assignments, reports, and client proposals. When teachers, managers, or clients read your work, page numbers in a PDF act as a small but clear sign of care and order.

    They also make navigation simple:

    • If a professor writes comments that refer to page 27, the reader can go straight to the right spot.

    • If a manager asks about a chart on page 6, nobody has to guess where that chart lives.

    • In research papers, contracts, and manuals, citations almost always refer to a specific page, so a PDF without embedded numbers slows everyone down.

    When people work together on the same file, page numbers help the group keep track of feedback and edits. They are also the base for any table of contents, whether printed or clickable. Many schools, courts, and offices list page numbering rules in their style guides — such as the Title Page and Pagination guidelines in Chicago Style — and can reject a file that ignores them. Most PDF viewers show a counter in the toolbar, but that is not part of the document itself, so you still need to add real numbers inside the pages.

    Without embedded page numbers, a long PDF report is just a stack of unnamed pages to your reader.

    How to Add Page Numbers to a PDF Using iLovePDFKit

    Uploading a PDF file using a browser-based tool

    If you are tired of hunting through menus in heavy desktop programs and only want a clear method for how to add page numbers to pdf, iLovePDFKit keeps things simple. The Add Page Numbers tool runs in any modern browser and does not ask you to sign up, pay, or install anything. You upload a file, set a few options, and download a clean PDF with precise, consistent page numbers.

    1. Go To The Tool
      Open your browser and head to the iLovePDFKit website, then choose the Add Page Numbers tool. The page loads quickly and works on Windows, macOS, Linux, or a school Chromebook with no extra setup. Because everything runs online, you can learn how to add page numbers to pdf on any computer that has internet access.

    2. Upload Your PDF
      Click the upload button or drag and drop your file into the marked area. iLovePDFKit starts secure transfer right away using SSL encryption, so the content of your document is kept private. You can upload reports, homework, contracts, or multi‑chapter drafts, and the tool will keep the layout pixel accurate in the output PDF.

    3. Customize Your Settings
      After upload, you see options to control where and how the numbers will appear. Choose a position such as top left, top center, top right, bottom left, bottom center, or bottom right. Pick a numbering style that fits your needs, for example a plain number, a Page label, or a format that shows both the current page and the total number of pages. You can also set a page range so you skip a cover page or early sections that should stay blank.

    4. Apply Page Numbers
      When your settings look right, click the button that applies the changes. iLovePDFKit processes your file within a few seconds, even if it has many pages. The tool adds the numbers directly into the PDF, keeping fonts and spacing stable, so the pages look neat and professional.

    5. Download Your File
      Once processing finishes, a download option appears for the new PDF with page numbers. Save it to your computer, upload it to a learning platform, or send it to a client right away. There are no watermarks on the file, no trial limits, and no surprise paywalls that appear after you finish your work.

    The biggest benefit of using iLovePDFKit is that all of these steps stay fast and simple. You do not create an account, and the service does not keep a long‑term copy of your documents. Real‑time processing, strong encryption, and clean output make it easy for anyone to learn how to add page numbers to pdf without any technical skill.

    Pro Tip: Need to number several PDFs for one big project? iLovePDFKit offers batch processing, which can handle multiple files in one run so you do not repeat the same steps again and again.

    When to Use Batch Processing

    Office professional batch processing multiple PDF files

    Batch processing is a lifesaver when the task is not just one PDF but a full set of files. For example:

    • A law office that needs numbers on hundreds of pages across many exhibits.

    • An academic who organizes several chapters and appendices as separate PDFs.

    • An office assistant with weekly reports from different teams that all must follow the same page number format.

    In these cases, uploading and configuring each file one by one would waste a lot of time. With iLovePDFKit batch processing, you set the style and position once, then add every related PDF to the same run. The tool applies matching page numbers to all of them in a single pass, which keeps their style consistent. Just like single‑file tasks, all documents in the batch use SSL protection and are removed from the server shortly after processing, so large‑scale work stays both efficient and private.

    “If a task needs doing more than once, consider automating it.” — Common Productivity Advice

    Customization Options For Position Format And Page Range

    PDF page number customization settings on a computer screen

    Not every document needs page numbers in the same place or with the same look. A lab report, a company handbook, and a court filing often follow very different rules. iLovePDFKit gives you flexible controls, so once you know how to add page numbers to pdf, you can also match the exact format your school, office, or client expects.

    To start, choose where the numbers sit on each page. The simple table below sums up the standard positions.

    LocationOptions
    Top headerTop left, top center, top right
    Bottom footerBottom left, bottom center, bottom right

    Bottom center is common in books, manuals, and many reports because the number feels balanced and hard to miss. Top right often appears in academic papers where other items share the footer area. If you already follow a style guide such as APA or a company brand rule, or if you need to renumber a PDF document that was formatted differently, pick the position that matches that guide.

    Next, choose a numbering style. A plain digit such as 1, 2, 3 works well for simple class notes or internal drafts. Adding text, for example Page 1 or Page 1 of 20, gives more context and looks more formal, which suits proposals and reference documents. Formats that show both the current page and the total page count help readers track progress through long files and can reassure them that nothing is missing.

    Page range control is just as important as position and style. Many documents have a cover page, a table of contents, or a title sheet that should not show a number even though it still counts in the overall flow. In iLovePDFKit you can choose to start numbering from any page so the first numbered page can display as 1 even if it is physically the second or third page of the file. You can also limit numbering to a section in the middle of the PDF, which is helpful for appendices or bundles that share one wrapper document.

    For clear, readable page numbers across your PDFs:

    • Keep the placement consistent from the first page you number to the last.

    • Avoid placing numbers too close to the edge, where some printers might cut them off.

    • Make sure the style you choose does not clash with headers or footers that already exist.

    “Consistency in page numbering is one of the first things editors look for in long documents.” — Common Academic Formatting Advice

    For academic submissions, always check the formatting guide from your school or department, since many teachers specify exact rules for where page numbers go, which font size to use, and which page should start the count.

    Conclusion

    Hands holding a professionally numbered PDF document printout

    Adding page numbers used to mean buying software, reading long manuals, and wrestling with complex menus. Now, once you understand how to add page numbers to pdf with iLovePDFKit, the whole task becomes a short stop in your workflow instead of a roadblock. You open your browser, upload the file, select a position and style, click once, and download a clean, ready‑to‑share PDF.

    With iLovePDFKit, you get:

    • Online access with no registration.

    • SSL‑protected uploads and short‑term file storage.

    • Batch processing that handles sets of PDFs for larger projects.

    • Output files with no added watermark.

    When you need more than numbering, the same site offers extra tools to merge, split, compress, and convert PDFs with the same simple approach. Whether you are finishing a thesis, polishing a business report, or organizing case files, iLovePDFKit helps you number your pages in seconds so you can focus on the content itself.

    FAQs

    Do I Need To Create An Account To Use iLovePDFKit?
    No account is needed for the Add Page Numbers tool or any other basic feature on iLovePDFKit. You visit the website, upload your PDF, and start working right away. This approach keeps the process fast and avoids storing personal profile data.

    Is iLovePDFKit Free To Use For Adding Page Numbers?
    Yes, adding page numbers with iLovePDFKit is completely free. There are no trial limits, hidden charges, or locked options that ask for payment later. Even batch processing stays included at no cost, which is helpful when you handle many files.

    Is It Safe To Upload My PDF To An Online Tool?
    iLovePDFKit protects your files during transfer with SSL encryption so the content cannot be read while it moves between your device and the server. After the page numbers are added and you download the new PDF, both the original and the edited versions are removed from the server. Since there is no account system, the site also does not keep a long‑term history of your documents.

    What Happens To My Page Numbers If I Edit The PDF Later?
    Once you add page numbers to a PDF, those numbers work like fixed text on the page. If you later insert, delete, or reorder pages, the numbers will not adjust on their own, which can make the sequence look wrong. It is best to finalize the page order before you number the file, but if changes are needed, you can simply upload the updated PDF to iLovePDFKit and run through the same quick steps again.

    Can I Skip The Cover Page When Adding Page Numbers?
    Yes, iLovePDFKit lets you choose where numbering begins so the cover can stay clean. You select a page range and set the first numbered page to show as 1 even if it is not the first physical page. This makes it easy to follow common rules for essays, theses, and formal reports.

  • How to Merge PDF Files for Free in Your Browser

    How to Merge PDF Files for Free in Your Browser

    Introduction

    A folder full of disconnected PDFs can feel like a desk covered in loose papers. One file holds the cover page, another has the main report, a third has charts, and a few more hide in email threads. Anyone who has ever wondered how to merge PDF files into one clean document knows how frustrating this can be.

    Students deal with separate assignment parts from group members. Office staff send five attachments when a manager really wants one polished file. Freelancers pull together contracts, briefs, and invoices for a client and then spend extra time checking that nothing is missing. In all of these cases, learning how to merge PDF files into a single document makes life much easier.

    The good news is that this does not require paid software or a long sign-up form. With iLovePDFKit, everything runs in the browser, completely free, with no account and no watermark on the final file. This guide walks through how to merge PDF files step by step, shows smart ways to organize them, explains how to combine other formats like Word and JPG, and answers the most common security questions so every file feels safe.

    “Simplicity is the ultimate sophistication.” — Leonardo da Vinci

    Bringing scattered pages together into one clear PDF is a small example of that idea in action.

    Key Takeaways

    Before diving into the details, here is a quick snapshot of what matters most.

    • Fast, Free PDF Merging: Merging PDF files can be done for free in under a minute with a simple browser tool. iLovePDFKit keeps the process short and direct from upload to download. No extra software or setup is needed to get a clean combined file.

    • No Accounts Or Watermarks: iLovePDFKit works without registration, email, or credit card, and it never adds watermarks on top of pages. The merged document looks just like the originals joined together, which makes the tool ready for graded work, client reports, and formal documents.

    • Secure, Flexible Workflow: Files move over an encrypted connection and are processed in real time, then removed from servers once the merge finishes. You control the order with an easy drag-and-drop view and can convert Word, Excel, PowerPoint, JPG, and PNG to PDF first, then merge everything in one go.

    How To Merge PDF Files For Free Using iLovePDFKit

    Person using a laptop to merge PDF files online

    When someone searches for how to merge PDF files, they usually want one thing: clear steps that actually work. iLovePDFKit is built for that kind of task. It runs fully in the browser, so there is nothing to download, and every merge is free with no watermark and no sign-up.

    The tool works smoothly on Chrome, Firefox, Safari, and Edge, whether you use Windows, macOS, Linux, or a phone. Even an older laptop or budget smartphone can handle large PDFs because iLovePDFKit does the heavy lifting on its servers. While it works, the original formatting stays intact, so text, tables, and images look the same after the merge.

    Here is how to merge PDF files with iLovePDFKit step by step:

    1. Open The Merge Tool
      Open a modern browser and go to the iLovePDFKit PDF Merge page. The main section of the page shows a clear upload area that invites you to add files. You do not need to log in or create an account before starting the merge.

    2. Upload Your PDFs
      Click the button that lets you select files from your device, or drag and drop your PDFs onto the upload area. You can pick several documents at once, which is helpful when working with long reports or bundles of scanned pages. This is the key starting point for anyone learning how to merge PDF files quickly.

    3. Arrange The Page Order
      After upload, iLovePDFKit shows each file as a thumbnail so you can see the order. Drag a file to a new spot to move it earlier or later in the combined document. The first thumbnail becomes the opening pages of the final PDF, so this step shapes the structure of your merged file.

    4. Start The Merge
      Once the order looks right, start the merge with a single click on the main action button. The service processes your PDFs within seconds, even if they contain many pages or images. During this phase, iLovePDFKit keeps the original fonts, margins, and layouts with pixel-level accuracy.

    5. Download Your Combined PDF
      When the merge is complete, download the new combined PDF directly to your device. There are no watermarks and no limits from trial versions, so the file is ready to submit, print, or share with a client.

    Before clicking merge, take a moment to double-check the order of your thumbnails. That small habit keeps cover pages, tables of contents, and chapters in the right place and makes learning how to merge PDF files feel smooth from the very first try.

    Why Merge PDF Files? Key Benefits And Real-World Use Cases

    Organized documents consolidated into a single neat file

    Knowing how to merge PDF files is helpful, but understanding why it matters turns it into a regular habit. One neatly combined PDF file is easier to handle than a handful of separate attachments or a random set of downloads hiding in different folders.

    First, merged files simplify storage and review — tools like Claude Cowork can turn 20 separate PDF files into a single research report, illustrating just how transformative this consolidation can be. Instead of hunting through four or five different documents to follow one project, everything lives in a single PDF. That master file is easier to rename, archive, and search, which helps both students tracking sources and teams managing project history.

    Second, a single merged PDF looks more professional when shared. Instead of sending a messy email with many attachments, one clean file arrives in the right order. The reader can scroll from start to finish without jumping between windows or wondering if a page is missing.

    Third, merged PDFs reduce confusion during collaboration. When everyone works from one document, comments and notes refer to the same page numbers. That is much smoother than juggling different versions of the same material.

    “The ability to simplify means to eliminate the unnecessary so that the necessary may speak.” — Hans Hofmann

    Merging related documents into one PDF follows that same idea: less clutter, clearer information.

    Here are common situations where how to merge PDF files pays off:

    Who Uses ItHow Merged PDFs Help
    Students and academicsCombine cover sheet, main paper, figures, and references into one polished submission.
    Office professionalsGather weekly updates, charts, and summaries into a single briefing file for managers.
    Freelancers and small businessesAttach proposals, contracts, and invoices in one organized client packet.
    People handling taxesGroup forms, receipts, and statements into one document for filing or sharing.
    Anyone scanning paperTurn separate scanned pages into a clear multi-page archive for records.

    No matter the role, once someone learns how to merge PDF files with a quick tool like iLovePDFKit, chores like reporting, submitting work, and storing records feel faster and far less stressful.

    How To Merge Different File Types Into One PDF

    Various document types being combined into one unified file

    In real life, not every document already sits in PDF form — and as research tools like A Software Feature for mixed methods analysis demonstrate, combining documents from multiple sources into one unified file is a recognized productivity need across academic and professional contexts. A research project might mix Word essays, Excel tables, PowerPoint slides, and a few JPG screenshots. When that happens, knowing how to merge PDF files is only half of the process. The other half is turning everything into PDFs first.

    iLovePDFKit solves this with a simple two-step approach that stays completely free:

    1. Convert Each File To PDF
      Use the right converter for each format:

      Each converter runs in the browser and keeps fonts, colors, and layouts accurate.

    2. Merge The New PDFs
      Once every source file is saved as a PDF, open the PDF Merge page on iLovePDFKit, upload all the converted PDFs, and arrange them in the order you want. Place the report first, the charts next, and any scanned signatures at the end, then merge everything into one final document.

    This two-step workflow works well for students building research packs — where Processing 50+ PDFs Simultaneously is a real scenario — professionals preparing client reports, and small business owners sending offer decks with supporting data. It keeps control over layout while showing clearly how to merge PDF files from many starting formats into a single, consistent PDF that is easy to share and archive.

    Security And Privacy When Merging PDFs Online

    Any time someone learns how to merge PDF files with an online tool, the next thought is often about safety. Many documents contain grades, contracts, payment details, or personal data, so trust matters as much as speed.

    iLovePDFKit is designed with privacy in mind. Files move between the browser and the service over an encrypted connection, which protects content while it travels across the network. During processing, the system works on each merge in real time instead of storing large archives of user documents.

    “Privacy is not an option, and it shouldn’t be the price we accept for just getting on the Internet.” — Gary Kovacs

    As soon as the merged PDF is ready and downloaded, iLovePDFKit clears the originals and the combined file from its servers. There is no hidden storage that keeps old uploads around for long periods. Because the merge tool does not require an account, there is also no profile full of personal details tied to every action.

    Some free tools keep files for hours or ask people to log in just to remove them. iLovePDFKit avoids that pattern and keeps the merge flow anonymous for regular use. This design makes it a strong fit for learners, office staff, and freelancers who want to know how to merge PDF files online without creating new logins everywhere.

    One more smart habit is to avoid uploading very sensitive information over public or shared Wi‑Fi connections. Even with a secure service, saving those tasks for trusted networks adds another layer of protection on top of what iLovePDFKit already provides.

    Conclusion

    Once someone learns how to merge PDF files, many small tasks become faster. Instead of chasing scattered attachments or juggling versions, one clean document carries everything needed for a class, meeting, or client handoff.

    iLovePDFKit makes this process easy. The merge tool runs in any modern browser, needs no account, stays free, and never stamps watermarks on top of hard work. Formatting stays accurate, files are processed quickly, and they are removed from servers after the job is done.

    Beyond merging, iLovePDFKit also handles splitting long PDFs, compressing large files, converting between formats, adding passwords, and more, all with the same simple approach. Ready to combine your files now? Open iLovePDFKit’s free PDF Merge tool and put everything into one polished PDF in just a few seconds.

    FAQs

    Question 1: Is It Really Free To Merge PDF Files With iLovePDFKit?

    Yes, merging PDF files with iLovePDFKit is completely free. There are no hidden fees, limits from short trials, or surprise charges after a few uses. You do not need to create an account, share an email address, or enter a card number. The finished merged PDF contains no watermark, so it is ready for school, work, or client use.

    Question 2: Will Merging PDFs Change The Formatting Or Layout Of My Documents?

    No, merging with iLovePDFKit does not change how your pages look. The service keeps fonts, images, spacing, and layout exactly as they appear in the original PDFs. When you learn how to merge PDF files with this tool, you are simply placing full documents one after another. The content is not edited or rebuilt during the merge.

    Question 3: Can I Merge Password-Protected PDF Files?

    Yes, password-protected PDFs can be included when you merge files with iLovePDFKit. When you upload a protected document, the tool asks for its password so it can open the content. If the correct password is entered, that file becomes part of the combined PDF. If the password is unknown or typed incorrectly, that file is skipped for safety.

    Question 4: How Many PDF Files Can I Merge At Once?

    iLovePDFKit supports merging several PDFs in a single session so larger projects stay manageable. Exact limits can change as the tool grows, so it is best to check the current details on the merge page. If a project has an especially high number of files, you can always merge them in two rounds and then combine those results into one final PDF.

  • Converting Web Page to PDF: Simple Guide

    Converting Web Page to PDF: Simple Guide

    Introduction

    Picture this: a great article, research paper, or tutorial appears right when a project is due, and there is that quiet fear the page will change or disappear. In those moments, converting a web page to PDF is a simple way to freeze what matters before it slips away.

    When you turn a page into a PDF, you take live, scrollable content and store it as a fixed document that keeps the same text, images, and layout — a concept explored in depth by research such as Paper2Web: Let’s Make Your paper alive, which examines how web and document formats interrelate. The file opens on almost any device and keeps its look on a phone, laptop, or office desktop. Once saved, it is ready for offline reading, printing, or sharing with classmates, clients, or a professor.

    Free online tools now make web page to PDF conversion something anyone can do in seconds, with no extra software or tech skills. iLovePDFKit follows that idea with a browser-based PDF converter that is fast, clean, and secure, and it does not ask for sign‑ups or credit cards. With it, converting a web page to PDF feels about as simple as copying and pasting a link.

    This guide explains why saving web content as PDF helps students, office teams, and freelancers, how to do it step by step, how to pick a safe online tool, and what to try when things go wrong. By the end, turning any useful page into a neat PDF record will feel natural.

    Key Takeaways

    Here is what you will learn about converting web pages to PDF in the next few minutes:

    • Saving a web page as PDF gives you a permanent snapshot that does not change when the site updates or disappears. Research, instructions, or receipts stay available even on a long flight or in a classroom with weak Wi‑Fi.

    • The basic process is quick and repeatable: copy the page link, paste it into an online PDF converter, click a button, and download the file. After that, the PDF is ready to store, print, or attach to an email.

    • Good web‑to‑PDF tools are free, run in the browser, and avoid asking for accounts. They use secure connections and remove files shortly after processing so your information is not left on a server.

    • iLovePDFKit offers fast, accurate, registration‑free web and document conversion. Processing happens online in real time, and files are removed soon after the task finishes, keeping web page to PDF conversion simple and safe for everyday work.

    Why Convert a Web Page to PDF?

    Student saving web page content for offline research on laptop

    Different people have different reasons for converting a web page to PDF, but the same advantages show up across study, office work, and small business tasks. You turn something fragile and changeable into a file you can trust, which helps with access, sharing, and record‑keeping.

    One major benefit is offline access and archiving. A page that loads fine at home may not load at the library, on the train, or in a courtroom. By saving it as a PDF, you keep a time‑stamped copy that travels with you on a laptop, tablet, or phone — and tools like Save any website as a PDF make that process accessible to anyone. This supports research trips, fieldwork, or any setting where internet access is weak or blocked.

    Many librarians like to say that “links fade, but PDFs stay put,” which is why archiving important pages as PDF is so common in research work.

    Another reason is cleaner sharing and collaboration. A PDF opens on almost any device and preserves fonts, images, and layout. When you send a PDF instead of a link, classmates, managers, or clients see exactly what you saw, even if the site changes later. They can highlight, comment, and add notes on top, which works far better for feedback than a long email thread.

    PDFs also help with documentation and printing. Converting a web page to PDF lets you control page size, margins, and headers so content drops neatly into reports or appendices. This matters when you print a study, attach evidence to a proposal, or submit formatted material for grading.

    Finally, there is a big gain in organization and data management. Instead of juggling dozens of tabs, you can convert key pages to searchable PDFs and store them in folders by course, client, or project. That makes it easier to search across several documents and show what you saw on a site at a certain point in time, which can be important in law, compliance, or journalism.

    To sum up common use cases, here is a quick view by audience:

    AudienceKey Benefit
    Students and academicsSave research material for offline reading and keep clear sources for citations
    Office professionalsArchive reference pages and share content that keeps its format with colleagues or clients
    Freelancers and small business ownersStore proposals and reference pages and keep a stable record of project details

    How to Convert a Web Page to PDF Online — Step by Step

    Hands copying a URL from browser address bar for PDF conversion

    The good news is that converting a web page to PDF online is easier than it sounds, even if you do not feel very technical. With the right tool, the whole task often takes less than a minute. Here is a simple path using a browser and a converter such as iLovePDFKit.

    1. Navigate To The Web Page
      Open your usual browser and go to the exact page you want to save. Wait a few seconds so that text, images, and extra sections finish loading. This helps the converter capture a complete copy instead of a half‑loaded snapshot.

    2. Copy The Page Address
      Click once in the address bar so the full link is highlighted. Use Ctrl + C on Windows or Cmd + C on macOS to copy it, or right‑click and choose Copy. That URL is what the web‑to‑PDF tool will use during conversion.

    3. Open iLovePDFKit In A New Tab
      In another tab, visit the iLovePDFKit website. There is no need to create an account, remember a password, or add personal details. You simply land on the tool and can start working straight away.

    4. Paste The URL Into The Converter
      Find the input field that asks for a web address. Click inside the box and paste your copied link with Ctrl + V or Cmd + V, or by using Paste from the menu. Double‑check that the link matches the page you want to convert.

    5. Adjust Optional Settings If Needed
      Many converters, including iLovePDFKit, let you pick page size, portrait or landscape layout, and margin width. You can often choose whether to include headers, footers, or the source link. Small tweaks here help when you need a tidy printout or a PDF that matches a report format.

    6. Start The Conversion
      Click the convert button to begin web page to PDF conversion. The service loads the page on its own servers and turns it into a PDF with a rendering engine similar to a modern browser. This happens online, so it does not slow down your device very much.

    7. Download And Store Your PDF
      After a short wait, the tool shows a download button or link. Click it to save the PDF to your computer, phone, or a cloud folder such as a shared team drive. From there you can rename it, move it into a project folder, or attach it to an email or learning platform.

    Pro tip: For pages with charts, delayed loading sections, or long image galleries, look for an advanced setting that adds a short wait time before capture. A few extra seconds can give a cleaner result when converting a web page to PDF.

    Keep in mind that pages behind a login, such as paid news sites or private dashboards, usually cannot be captured by any online converter. The tool visits the link as a new, anonymous user, so it can only reach content that is public. For public pages, iLovePDFKit gives a fast, no‑cost way to turn those links into PDFs while keeping layouts and formatting neatly in place.

    How to Choose the Right Online Web-to-PDF Tool

    Office professional reviewing a converted PDF document on monitor

    There are many sites that promise easy web page to PDF conversion, but they are not all the same. Some change the layout, some add watermarks, and some hold on to your files longer than you might like. A quick check of a few points helps avoid problems later.

    • Rendering Accuracy
      A good converter should give you a PDF that looks very close to the original page. Fonts, images, columns, and spacing should line up in a familiar way. Tools that use modern browser engines usually give better results.

    • Security And Privacy
      When converting a web page to PDF, the content often includes grades, invoices, or other sensitive data. Look for tools that use HTTPS in the browser and remove files from their servers shortly after processing instead of keeping long‑term copies.

    • No Account Required
      For many people, the best online tools are the ones that do not ask for names, emails, or payment details. Being able to visit a site and start converting right away saves time and keeps personal information to a minimum.

    • Ease Of Use
      A clean layout helps everyone from high school students to senior managers. Clear labels, one main input field, and a single convert button keep the process simple, even a few minutes before a meeting or deadline.

    • Speed And Reliability
      Because the heavy work happens on remote servers, a strong tool can return a finished PDF within seconds for most pages. Even on slower connections, the process should feel smooth and predictable.

    • Cross‑Device Access
      Work often shifts between laptop, phone, and tablet, so it helps when the converter runs fully in the browser. That way you can start converting web pages to PDF on your phone during a commute and repeat the same steps back at your desk.

    iLovePDFKit lines up well with these checks. It is free to use, adds no watermarks, and does not hide strict limits behind surprise pop‑ups. All processing happens over secure connections, and files are cleared from the servers after the task finishes, which keeps sensitive material safer.

    “With iLovePDFKit, there is nothing to install, no account to create, and no cost to watch. You simply paste a link, click once, and receive a clean PDF ready for study, sharing, or records.”
    — iLovePDFKit team

    For students, office staff, and freelancers, that mix of speed, privacy, and accuracy makes iLovePDFKit a solid everyday choice whenever converting a web page to PDF is part of the workflow.

    Troubleshooting Common Web-to-PDF Conversion Problems

    User troubleshooting a slow web to PDF conversion on laptop

    Even with a good tool, converting web pages to PDF can run into problems because some sites are heavy or built with older code. Most issues repeat, and there are simple things to try before giving up.

    • Conversion Is Slow Or Stops Partway
      Some pages load many large images, ads, or scripts, and the converter has to wait for all of them. This can make the process feel stuck even when the tool is working. Try waiting a bit longer, closing extra tabs, or using a more stable connection. If the converter offers a delay setting, adding a few seconds can help it capture a fully loaded page.

    • The PDF Layout Looks Different From The Web Page
      If headings shift or images move, the page might use older HTML or tricky styles. First, open the page in a current browser and see how it behaves when you resize the window. Then adjust settings in the converter, such as page size, margins, or orientation. A small change often fixes layout issues.

    • The PDF Only Shows A Sign‑In Screen
      If the final file shows nothing but a login box, the original page is behind a password. The converter does not know your details, so it can only reach that first gate. To confirm, open the link in a private or incognito window; if you also see a login there, online tools will not be able to reach the actual content.

    • Content Is Cut Off At The Edges Or Bottom
      Some sites use fixed‑width designs that do not shrink or wrap nicely on standard paper sizes. When converting a web page to PDF, this can clip text, tables, or images. Try a larger page size in the converter and reduce the margins so the content has more room.

    When you keep these patterns in mind, most problems feel less mysterious. A few quick tests and small setting changes will solve many issues without extra software or advanced skills.

    Conclusion

    Organized digital workspace with saved PDF files on tablet

    Converting a web page to PDF is a small habit that can prevent a lot of stress later. It turns changeable online content into files that stay with you, ready for study sessions, meetings, or client work, no matter what happens to the original site.

    The right tool makes that process smooth instead of frustrating. iLovePDFKit gives you fast, accurate, secure conversion in the browser, with no cost, no registration, and no extra software on your device. Files travel over safe connections and are removed from the servers soon after use, which is ideal when grades, contracts, or bills are involved.

    If you are ready to make web content as manageable as the rest of your documents, open iLovePDFKit in a tab and try converting a web page to PDF for yourself. Paste a link, click once, and see how much easier study and work feel when the pages you rely on live in tidy PDFs.

    FAQs

    Is It Really Free to Convert a Web Page to PDF with iLovePDFKit?

    Yes, converting a web page to PDF with iLovePDFKit is completely free. There are no hidden fees, no trial periods, and no card details needed. The tool also does not place watermarks on your PDFs. You simply visit the site, paste your link, and download the result.

    Do I Need to Install Any Software to Convert a Web Page to PDF?

    No extra software is needed for web page to PDF conversion with iLovePDFKit. The tool runs fully in the browser, so there are no plugins or extensions to manage. You can use it on Windows, macOS, Linux, or mobile devices. As long as you have a modern browser and internet access, you are ready to go.

    Is My Data Safe When Using an Online Web-to-PDF Converter?

    With a reputable service like iLovePDFKit, data safety is a clear focus. All traffic between your browser and the site uses secure connections, which helps keep links and files private during transfer. The platform removes processed files from its servers after a short time instead of storing them long term. Because you do not create an account, there is also very little personal information to keep or share.

    Why Does My Converted PDF Look Different from the Original Web Page?

    Layout changes during web page to PDF conversion usually come from the way the original site is coded. Older or very complex pages can behave oddly when they are squeezed into standard paper sizes. First, see how the page looks in a modern browser and try resizing the window. Then try different page sizes, orientations, or margin settings in the converter until the content fits more comfortably. Most current sites will match very closely when used with a high‑quality tool such as iLovePDFKit.

  • What Is a PDF/A File? Simple Guide for Long-Term PDFs

    What Is a PDF/A File? Simple Guide for Long-Term PDFs

    Introduction

    The first time many people hear the phrase PDF/A is when a professor, boss, or court website suddenly says a file must be in that format. It is common to stop and wonder what is a PDF/A file and why a regular PDF is not enough. It can feel like one more technical rule on top of everything else.

    PDF/A is not just another file type. It is a special version of PDF created so a document will look the same many years from now, no matter which computer, phone, or app opens it. The letter A stands for Archival, which hints at the main idea. The file carries everything it needs inside itself so nothing breaks later.

    This guide walks through what a PDF/A file actually is, how it differs from a normal PDF, what the different PDF/A versions mean, where people use it, and how to create one. By the end, the phrase what is a pdf/a file should feel simple, and it will be clear how to meet any PDF/A requirement without stress.

    Think of PDF/A as a “printout that lives inside your computer”—the pages should look the same every time you open them, even decades from now.

    Key Takeaways

    • PDF/A is an ISO standard (ISO 19005) made for long‑term archiving, where the A stands for Archival and the goal is stable viewing far into the future. It is a stricter form of PDF that cares more about long life than fancy features. When someone asks what is a pdf/a file, the short answer is that it is a long‑lasting PDF.

    • A PDF/A file is fully self‑contained, which means it holds all fonts, colors, images, and needed data inside the file. It does not depend on system fonts or outside links that might disappear. This design gives much more confidence that the file will still look right decades from now.

    • PDF/A removes risky or fragile features such as JavaScript, encryption, some types of multimedia, and external content. Several versions exist, from PDF/A‑1 to PDF/A‑4, with different conformance levels for basic display, full accessibility, or strong text search. Governments, courts, universities, banks, and many companies now ask for PDF/A in their rules.

    What Is a PDF/A File and Why Does It Matter?

    Government archive room with organized document storage shelves

    When someone asks what is a pdf/a file, the most accurate answer is that it is an ISO standard profile of PDF created for long‑term archiving. The standard is called ISO 19005, and it spells out how a PDF must be built so it can be read far into the future. The idea is simple: a PDF/A file should open and look the same in ten, twenty, or fifty years.

    The core rule behind PDF/A is self‑containment. A regular PDF can rely on fonts installed on a computer, link to images on a server, run scripts, or include interactive parts that depend on future software. A PDF/A file instead embeds fonts, color profiles, images, and key metadata right inside the document. That way the file does not need help from the outside to display correctly.

    PDF/A trades some interactive features for predictability: what you see now is what you should see in the future.

    PDF/A also bans a group of features that might age badly or block future access:

    • Encryption and external references

      • If a file is locked and the password or key is lost, people cannot read it later, so PDF/A does not allow that.

      • Linked images or fonts can vanish over time, which would break the layout, so those links are not allowed either for required content.

    • Dynamic or active content

      • JavaScript, automatic actions, or executable code might be blocked by future viewers for safety reasons, and that would change how the file behaves.

      • Audio and video content can depend on codecs that may not work later, so they are removed in PDF/A in favor of plain visual content.

    • Certain older or fragile technologies

      • Dynamic XFA forms and some compression methods can cause problems for long storage, either for legal reasons or because they rely on tools that may fade away.

      • PDF/A keeps form fields but asks for a stable visual appearance instead of dynamic layouts.

    Along with those limits, PDF/A sets some positive rules:

    • A PDF/A file must embed every font it uses, and the font must allow this use under its license. This rule covers both normal text and special symbols, which is especially important for math, science, and multilingual work, since missing fonts can turn formulas into unreadable symbols.

    • Colors in a PDF/A file use device‑independent color spaces, along with profiles that describe how they should look. This helps printed reports and on‑screen views match more closely, even when hardware changes. It reduces the chance that a logo or highlight color will shift over time.

    • PDF/A also asks for standards‑based metadata and stable appearances for notes and form fields. This helps search tools and archive systems understand what the document is, while still keeping a clear visual layout that any viewer can draw without extra tricks.

    A quick way to see the difference between a standard PDF and PDF/A is to compare key traits side by side.

    FeatureStandard PDF
    FontsCan link to system fonts
    EncryptionOptional
    Multimedia and scriptsAllowed
    External referencesAllowed
    Long‑term reliabilityVaries by viewer and system
    FeaturePDF/A File
    FontsAlways embedded
    EncryptionNot allowed
    Multimedia and scriptsNot allowed
    External referencesNot allowed for required content
    Long‑term reliabilityDesigned for stable visual reproduction

    This is why PDF/A matters. A standard PDF might open in thirty years with broken fonts, missing images, or blocked scripts. A well‑made PDF/A file, by design, avoids those traps and keeps the document readable and complete.

    PDF/A Versions and Conformance Levels Explained

    Professional working on archival PDF document at laptop

    Once the basics of what is a pdf/a file are clear, the next question is often about the different versions. PDF/A is not a single frozen format. It has grown in steps as the main PDF standard added new features. Each step keeps the same archiving goal but adds or adjusts options.

    Here is a short summary of the main versions.

    VersionYear PublishedBased OnKey Feature AddedConformance Levels
    PDF/A‑12005PDF 1.4First archival profilePDF/A‑1a, PDF/A‑1b
    PDF/A‑22011PDF 1.7Transparency, JPEG 2000, OpenType, signaturesPDF/A‑2a, PDF/A‑2b, PDF/A‑2u
    PDF/A‑32012PDF 1.7Embedding of any file typeSame as PDF/A‑2
    PDF/A‑42020PDF 2.0Updated model and special engineering levelBase profile, PDF/A‑4f, PDF/A‑4e

    PDF/A‑1 is the original standard. It is based on PDF 1.4 and focuses on stable visual appearance. The PDF/A‑1b level is about basic viewing, so it checks that everything needed to draw the page is present. The PDF/A‑1a level adds structure tags, language settings, and Unicode mapping, which helps screen readers and other assistive tools. At this stage features like transparency and layers were not allowed, which kept things simpler for viewers of that time.

    PDF/A‑2 arrived as PDF itself gained more power. This version added support for JPEG 2000 compression, transparency effects, optional layers, OpenType fonts, and stronger digital signatures that follow PAdES rules. It also allowed a PDF/A file to carry other PDF/A documents inside it, which helps bundle sets of related records together. The new PDF/A‑2u level joined the earlier A and B levels. It keeps the focus on visual output while asking that all text map to Unicode so search and copy work reliably.

    PDF/A‑3 kept almost all of PDF/A‑2 but opened the door to embedding many other types of files. A PDF/A‑3 document might include an XML data file, a spreadsheet with raw numbers, or a word processor source file. This option helps keep final versions and source data together. Archivists sometimes worry that these attached files might be stored in formats that will not age well, so archives often write their own rules about which attachments are allowed.

    PDF/A‑4 is based on PDF 2.0 and reflects modern usage. The base profile keeps the archiving focus, while PDF/A‑4f keeps the ability to embed other files. The PDF/A‑4e profile is aimed at engineering content, such as 3D models and rich media inside technical documents, and it replaces the older PDF/E standard for that niche. For most day‑to‑day needs, people only need to know that PDF/A‑4 is the current family and that older versions are still valid.

    To keep the conformance levels straight, it helps to remember:

    • “a” (accessible) – visual appearance plus tagged structure for better accessibility.

    • “b” (basic) – visual appearance only; focuses on how the page looks.

    • “u” (Unicode) – visual appearance plus reliable text extraction via Unicode.

    For students, office staff, and small business owners, the most common requirements are still PDF/A‑1b or PDF/A‑2b. These levels give stable viewing without extra accessibility demands. When in doubt about what is a pdf/a file that fits a rule, it is best to read the instructions from the school, court, or company and match the exact version they name.

    Who Uses PDF/A and What Are Its Advantages?

    Professionals reviewing archival PDF documents in a meeting

    Knowing what is a pdf/a file becomes much more helpful when it connects to real life. Many types of organizations already rely on PDF/A every day, even if individual users only notice the requirement line on a form.

    • Government agencies and legal systems depend on PDF/A for laws, rulings, and case files. These records must remain readable and unchanged for many years, since people may cite them far into the future. PDF/A helps courts and offices avoid broken links, missing exhibits, or strange fonts when files move between systems.

    • Libraries, archives, and research funders use PDF/A to protect digital collections. When a grant rule or repository page says a file must be PDF/A, that is about long life and access. Institutions that care about access for people with disabilities also like the tagged and structured versions of PDF/A, which work better with screen readers.

    • Universities and research centers often ask for theses, dissertations, and final reports in PDF/A format. These works may contain formulas, non‑Latin scripts, or special charts that depend heavily on fonts and layout. With PDF/A, the graduate who moves on can trust that their hard work will still display correctly in the campus library.

    • Banks, insurers, and many businesses use PDF/A for contracts, policy documents, and statements that must stay on file. These files may need to be checked during audits, disputes, or renewals years later. A clear, stable copy avoids confusion and helps show that nothing has changed since signing.

    PDF/A also brings a set of clear advantages that matter to everyday users:

    • Long‑term preservation is the core benefit. A PDF/A file is built so its look does not depend on outside fonts or servers. That means a student can send a thesis to a national archive or a company can store a contract and have much more peace of mind about how it will appear in the future.

    • Visual integrity across devices is another strong point. Since the file holds everything needed to draw each page, a PDF/A document should look the same on a phone, office PC, or future tablet. That consistency saves time, because there is less worry about layout shifts or missing characters when someone opens the file in another place.

    • Support for many languages and accessible text is also important. When PDF/A uses Unicode mapping and, in higher levels, structure tags, it becomes easier to search, copy, or read with assistive tools. This helps organizations meet legal access rules and helps readers who rely on screen readers or who work with complex scripts.

    If a document might matter to someone ten years from now, PDF/A is a strong candidate for how it should be stored.

    For students and professionals, these benefits turn PDF/A from a dry standard into a quiet helper. Once it is clear what is a pdf/a file used for, it starts to feel like a smart default for any document that matters long term.

    How to Create a PDF/A File

    Overhead workspace setup for converting documents to PDF/A

    Reading rules about what is a pdf/a file is one thing. Creating one for a thesis, report, or contract is another. The good news is that many common tools already know how to save to PDF/A once the right options are chosen.

    A practical workflow looks like this:

    • Step 1: Create a clean PDF from your source file.
      A browser‑based tool such as iLovePDFKit can convert Word, Excel, PowerPoint, and image files into standard PDFs while keeping fonts and layout as close as possible to the original. Starting from a clean PDF reduces problems later when you apply PDF/A rules.

    • Step 2: Convert that PDF to PDF/A with a desktop app.
      Open the PDF in software that supports PDF/A export and select the right profile (for example, PDF/A‑1b or PDF/A‑2b) before saving.

    If you are working directly from Microsoft Word, you can also use its built‑in export:

    1. Open the finished document, then go to the File menu and choose Save As. Pick a folder and give the file a clear name that helps you find it later. This first step makes sure the export goes to the right place.

    2. In the Save as type list, select the PDF choice so Word knows to create a PDF file. At this stage the file is set to be a regular PDF, so one more step is needed to meet the archival rules. Many people stop here, which is why some PDFs do not pass PDF/A checks.

    3. Click the Options button in the save window, then look for the setting that mentions PDF/A. Check that box so Word writes the extra data and follows the rules for long‑term viewing. Save the file and wait for Word to finish the export.

    Adobe Acrobat Professional can also convert an existing PDF into PDF/A. You open the file, use the File → Save As Other choice, and select the archivable PDF option that matches the target level. The Preflight tool inside Acrobat can scan the file, try to fix common issues, and report whether the result follows the right profile.

    Other apps, such as LibreOffice, OpenOffice, and some virtual PDF printers, have similar export options. No matter which tool you use, it is very important to perform a slow visual check of the converted file:

    • Scroll through each page.

    • Look for missing characters or strange symbols.

    • Confirm that images, tables, and charts look correct.

    • Check that page numbers, headings, and hyperlinks (if present) behave as expected.

    Automatic conversion can miss characters, swap fonts, or add small graphic errors, and a few minutes of review can catch these before a professor, client, or court does.

    For people who first need a clean, well‑formed PDF before handling PDF/A settings, iLovePDFKit is a helpful first step in the workflow described above. It lets you work from a browser and convert common office formats into high‑quality PDFs, which you can then pass to a desktop tool to create the final PDF/A version.

    Conclusion

    PDF/A exists to answer a simple question: what is a pdf/a file that can still be trusted many years from now? It is a strict form of PDF that trades fancy features for stable viewing, by embedding everything it needs and avoiding parts that might fail later.

    Most people only need a basic level such as PDF/A‑1b or PDF/A‑2b, along with a quick visual check after conversion. Once that habit is in place, archiving becomes much less stressful.

    Whenever a high‑value document starts as Word, Excel, PowerPoint, or an image, iLovePDFKit offers a fast way to create a clean PDF with accurate formatting as the first step in a solid PDF/A workflow.

    Save once, read forever—that is the promise a well‑prepared PDF/A file tries to keep.

    FAQs

    Is PDF/A The Same As A Regular PDF?

    No, they are not the same even though both use the PDF extension. A regular PDF can use encryption, JavaScript, multimedia, and external links without any extra rules. A PDF/A file must follow an ISO standard for archiving, so it bans or limits those features to keep the document stable.

    Can I Open A PDF/A File Without Special Software?

    Yes, most modern PDF viewers can open a PDF/A file without any problem. Free tools such as Adobe Acrobat Reader often display a message that the file is in PDF/A mode, but they still open it like a normal document. Special software is mainly needed when you create or validate PDF/A files, not when you simply read them.

    Why Is My PDF/A File Larger Than A Regular PDF?

    A PDF/A file often ends up bigger because it embeds every font it uses instead of pointing to fonts on the computer. That extra data takes space but protects against missing characters or layout changes later. Many people see this size increase as a fair trade for a document that will still look correct many years from now.

    Which PDF/A Version Should I Use?

    For most students, researchers, and office workers, a basic level such as PDF/A‑1b or PDF/A‑2b is enough. These profiles focus on clear visual output and match what many institutions ask for in their rules. When there is any doubt about what is a pdf/a file that meets a rule, check the instructions from the receiving organization and choose the exact version they name.